
Edit Chargeable Items Table
Set sales and tax rate for your line items in the chargeable items table.
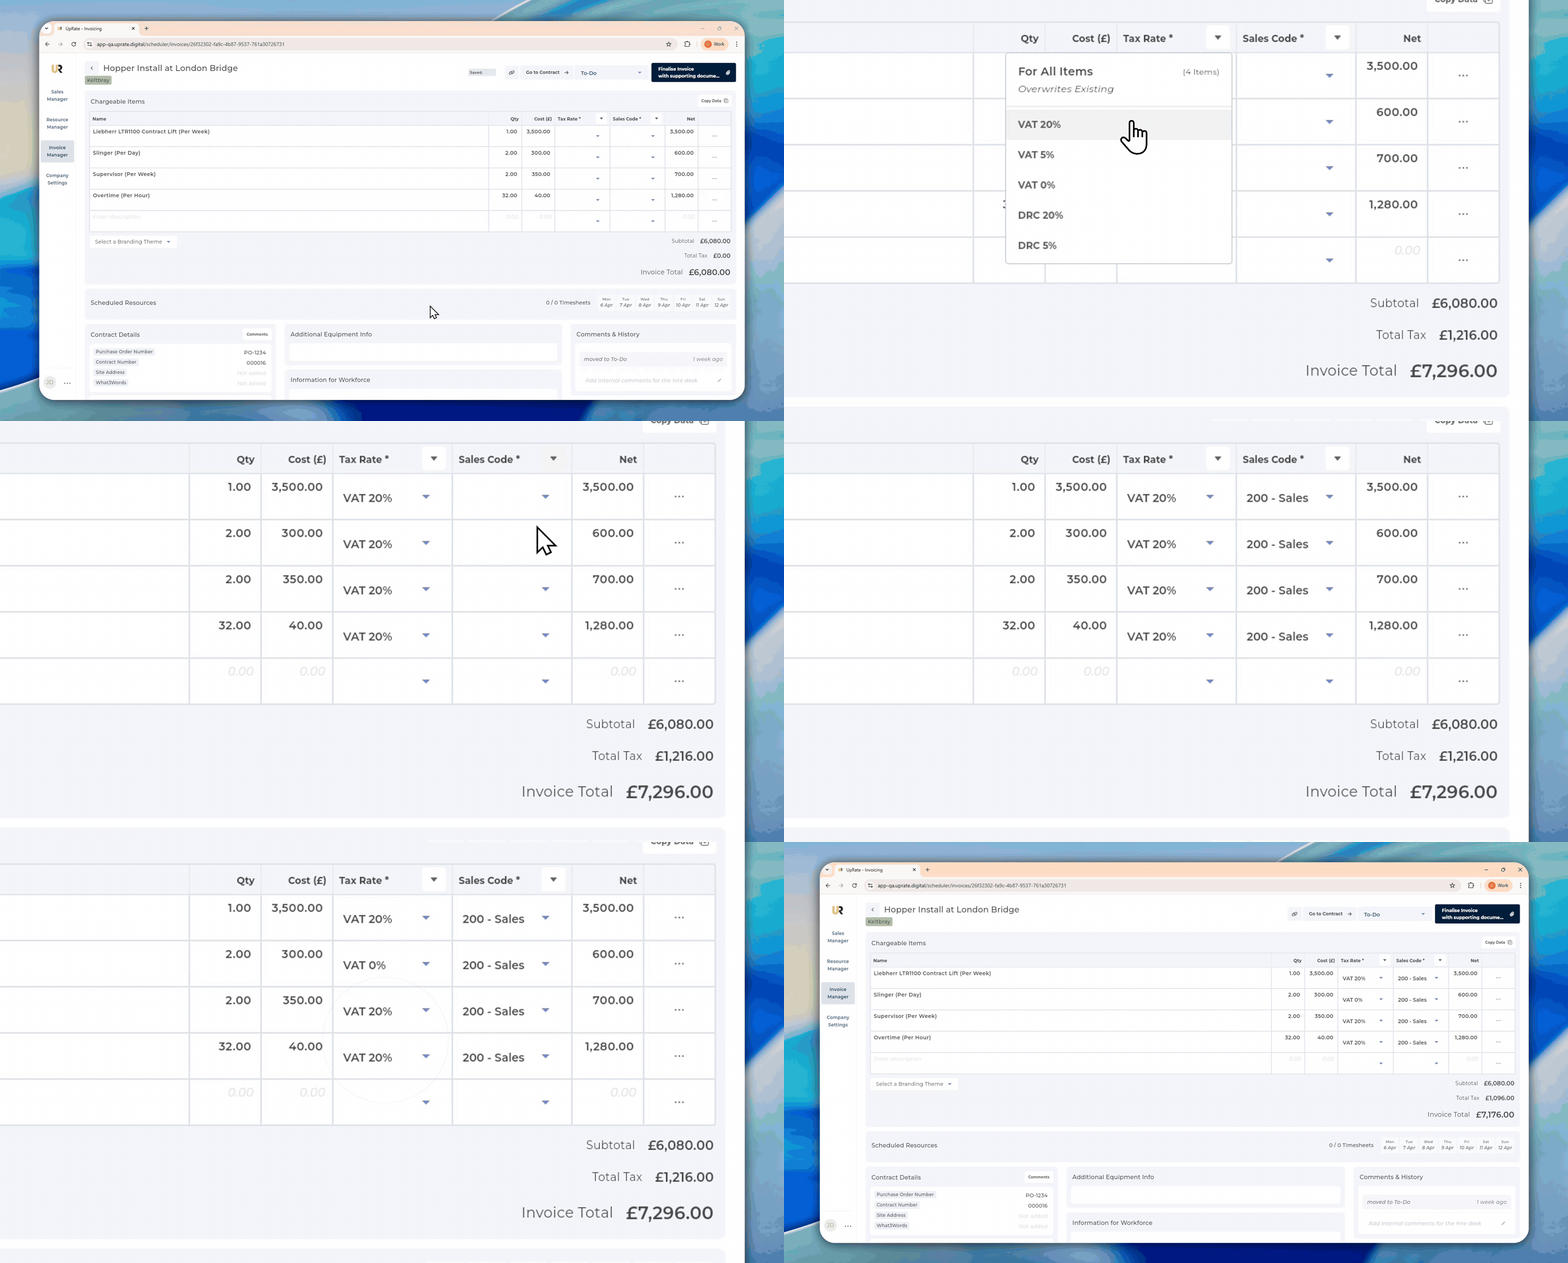
On the invoice page you have the ability to set Sales and Tax rate for your line item either individually or for the entire column.
Sales code is only enabled with Xero integration!
Edit Chargeable Items Table
Set Sales and Tax code for Line Items
Setting the Sales Code and Tax Rate prepares each line item for Xero export. These values do not take effect in Xero until the invoice is sent, and remain reference-only within our platform until then.
Open the Invoice Manager.
Find the invoice you want to edit
Click on the Tax Rate column header to select Tax code for the entire column
Click on the Sales Code column header to select Sales code for the entire column (only available with Xero integration!)
Set either Sales code or Tax rate individually for each line item if needed
Total Tax gets automatically calculated based on your selection
Set Tracking Categories for Line Items
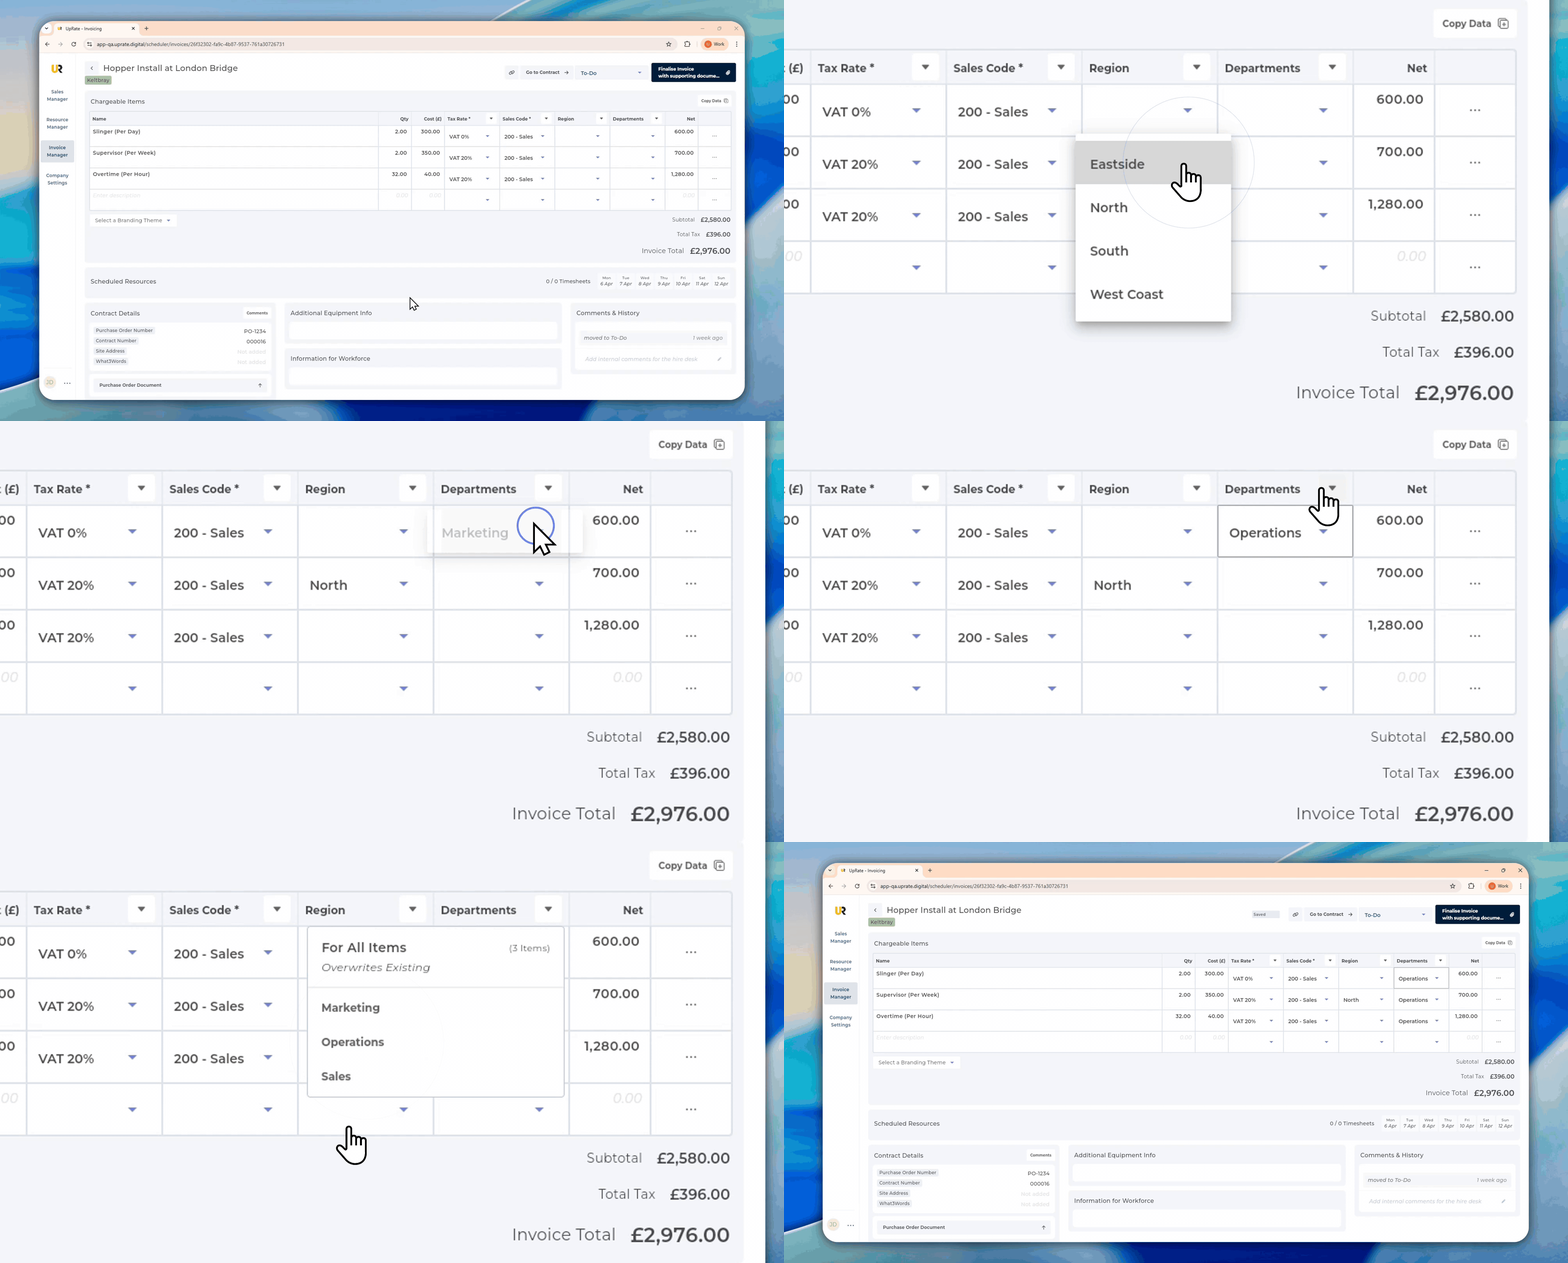
If tracking categories are enabled in Xero, they can be selected here. Xero allows up to four tracking categories overall, with a maximum of two active at any one time. The number of tracking columns shown will match the number of active tracking categories in Xero.
Setting the tracking categories prepares each line item for Xero export. These values do not take effect in Xero until the invoice is sent, and remain reference-only within our platform until then.
Open the Invoice Manager.
Find the invoice you want to edit
Click on the Tracking Category column header to select tracking category for the entire column
Select from the dropdown menu to select for individual line items
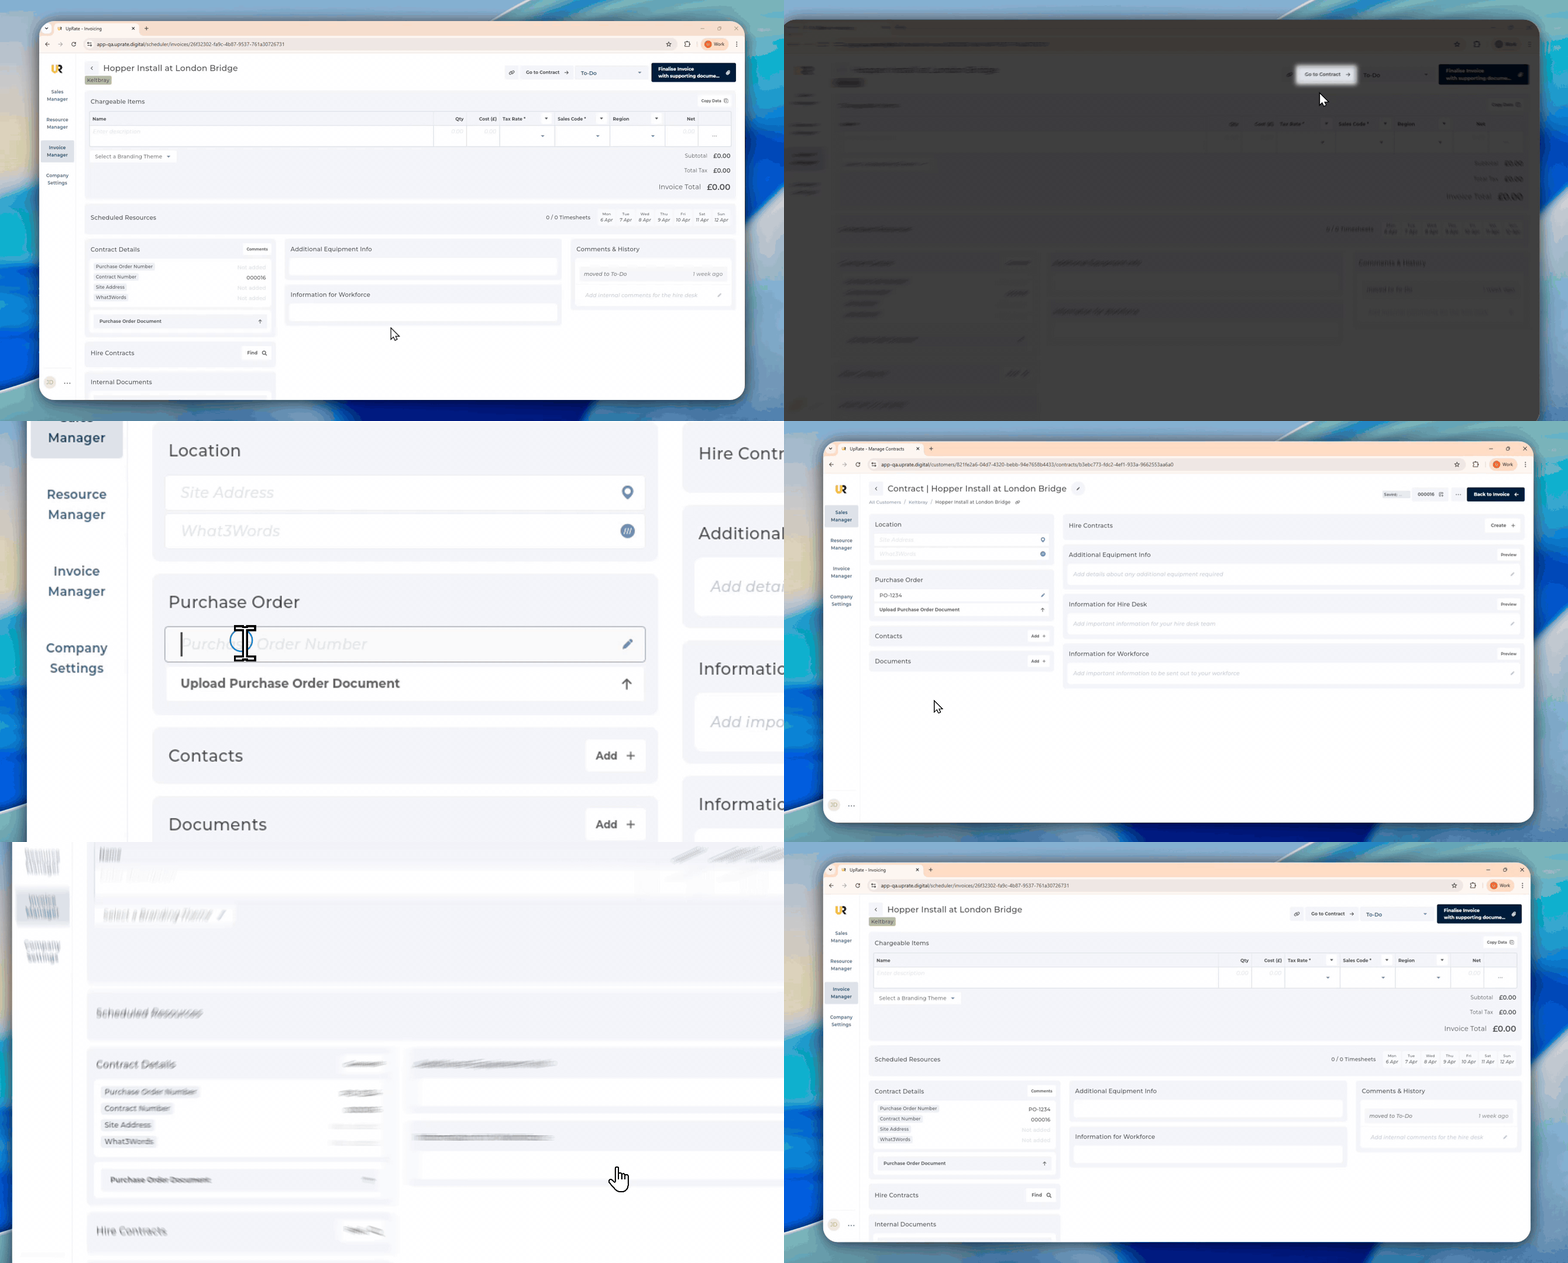
Add/Edit Missing PO Number From Invoice
On the invoice page you have the ability to add or edit the PO number before you finalise an Invoice.
Open the Invoice Manager
Find the invoice you want to edit
Click Go to Contract
Add/edit PO number
Click Back to Invoice