

Multiple Assignment Per Day
A guide on how to use the new feature that allows you to book multiple assignments for a day.
New Features Introduced
Multiple Assignments Per Day
You can now add more than one assignment to the same day on the Scheduler.
When multiple assignments are added for one day, you can also change the order of the assignment stickers by changing the start time for the resource. This helps you show which assignment should happen first, second, third, and so on.
Assignment Overview
A new Assignment Overview feature has been added.
This gives you a quick summary of key assignment information, including:
Contract details
Assignment information
Daily resource view
Resources assigned on the day
This makes it easier to review the assignment without opening multiple pages or sections.
Assignment Messages
Assignment Messages have been moved to the side panel.
To view or edit an Assignment Message, open the assignment overview and use the side panel options.
Multiple Assignments Per Day
Creating Assignment - Allow All Bookings
When creating a new assignment, you may see a conflict if the selected resource is already booked on one or more of the selected days.
You now have the option to Allow All Bookings as well as Overwrite or Avoid these conflicts.
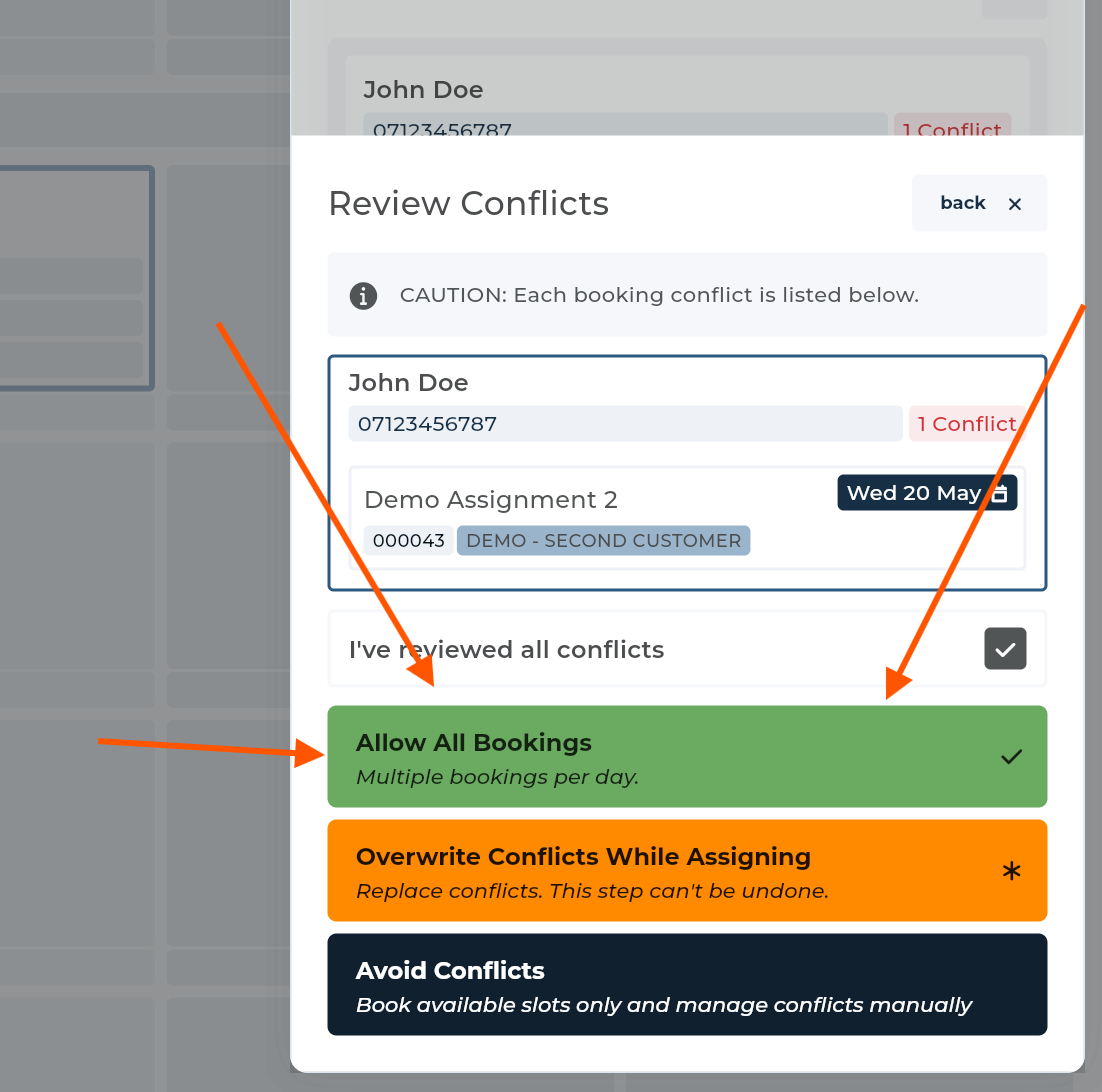
When Allos All Bookings is selected, UpRate will create the new assignment for the conflicting days. This means the resource will have multiple assignments on those days.
Overbooking on the Engagement Scheduler Pop Up
On the Engagement Scheduler pop-up, you can now book any day for any resource.
Previously, days with existing assignments were greyed out and could not be selected. These days are now available to book.
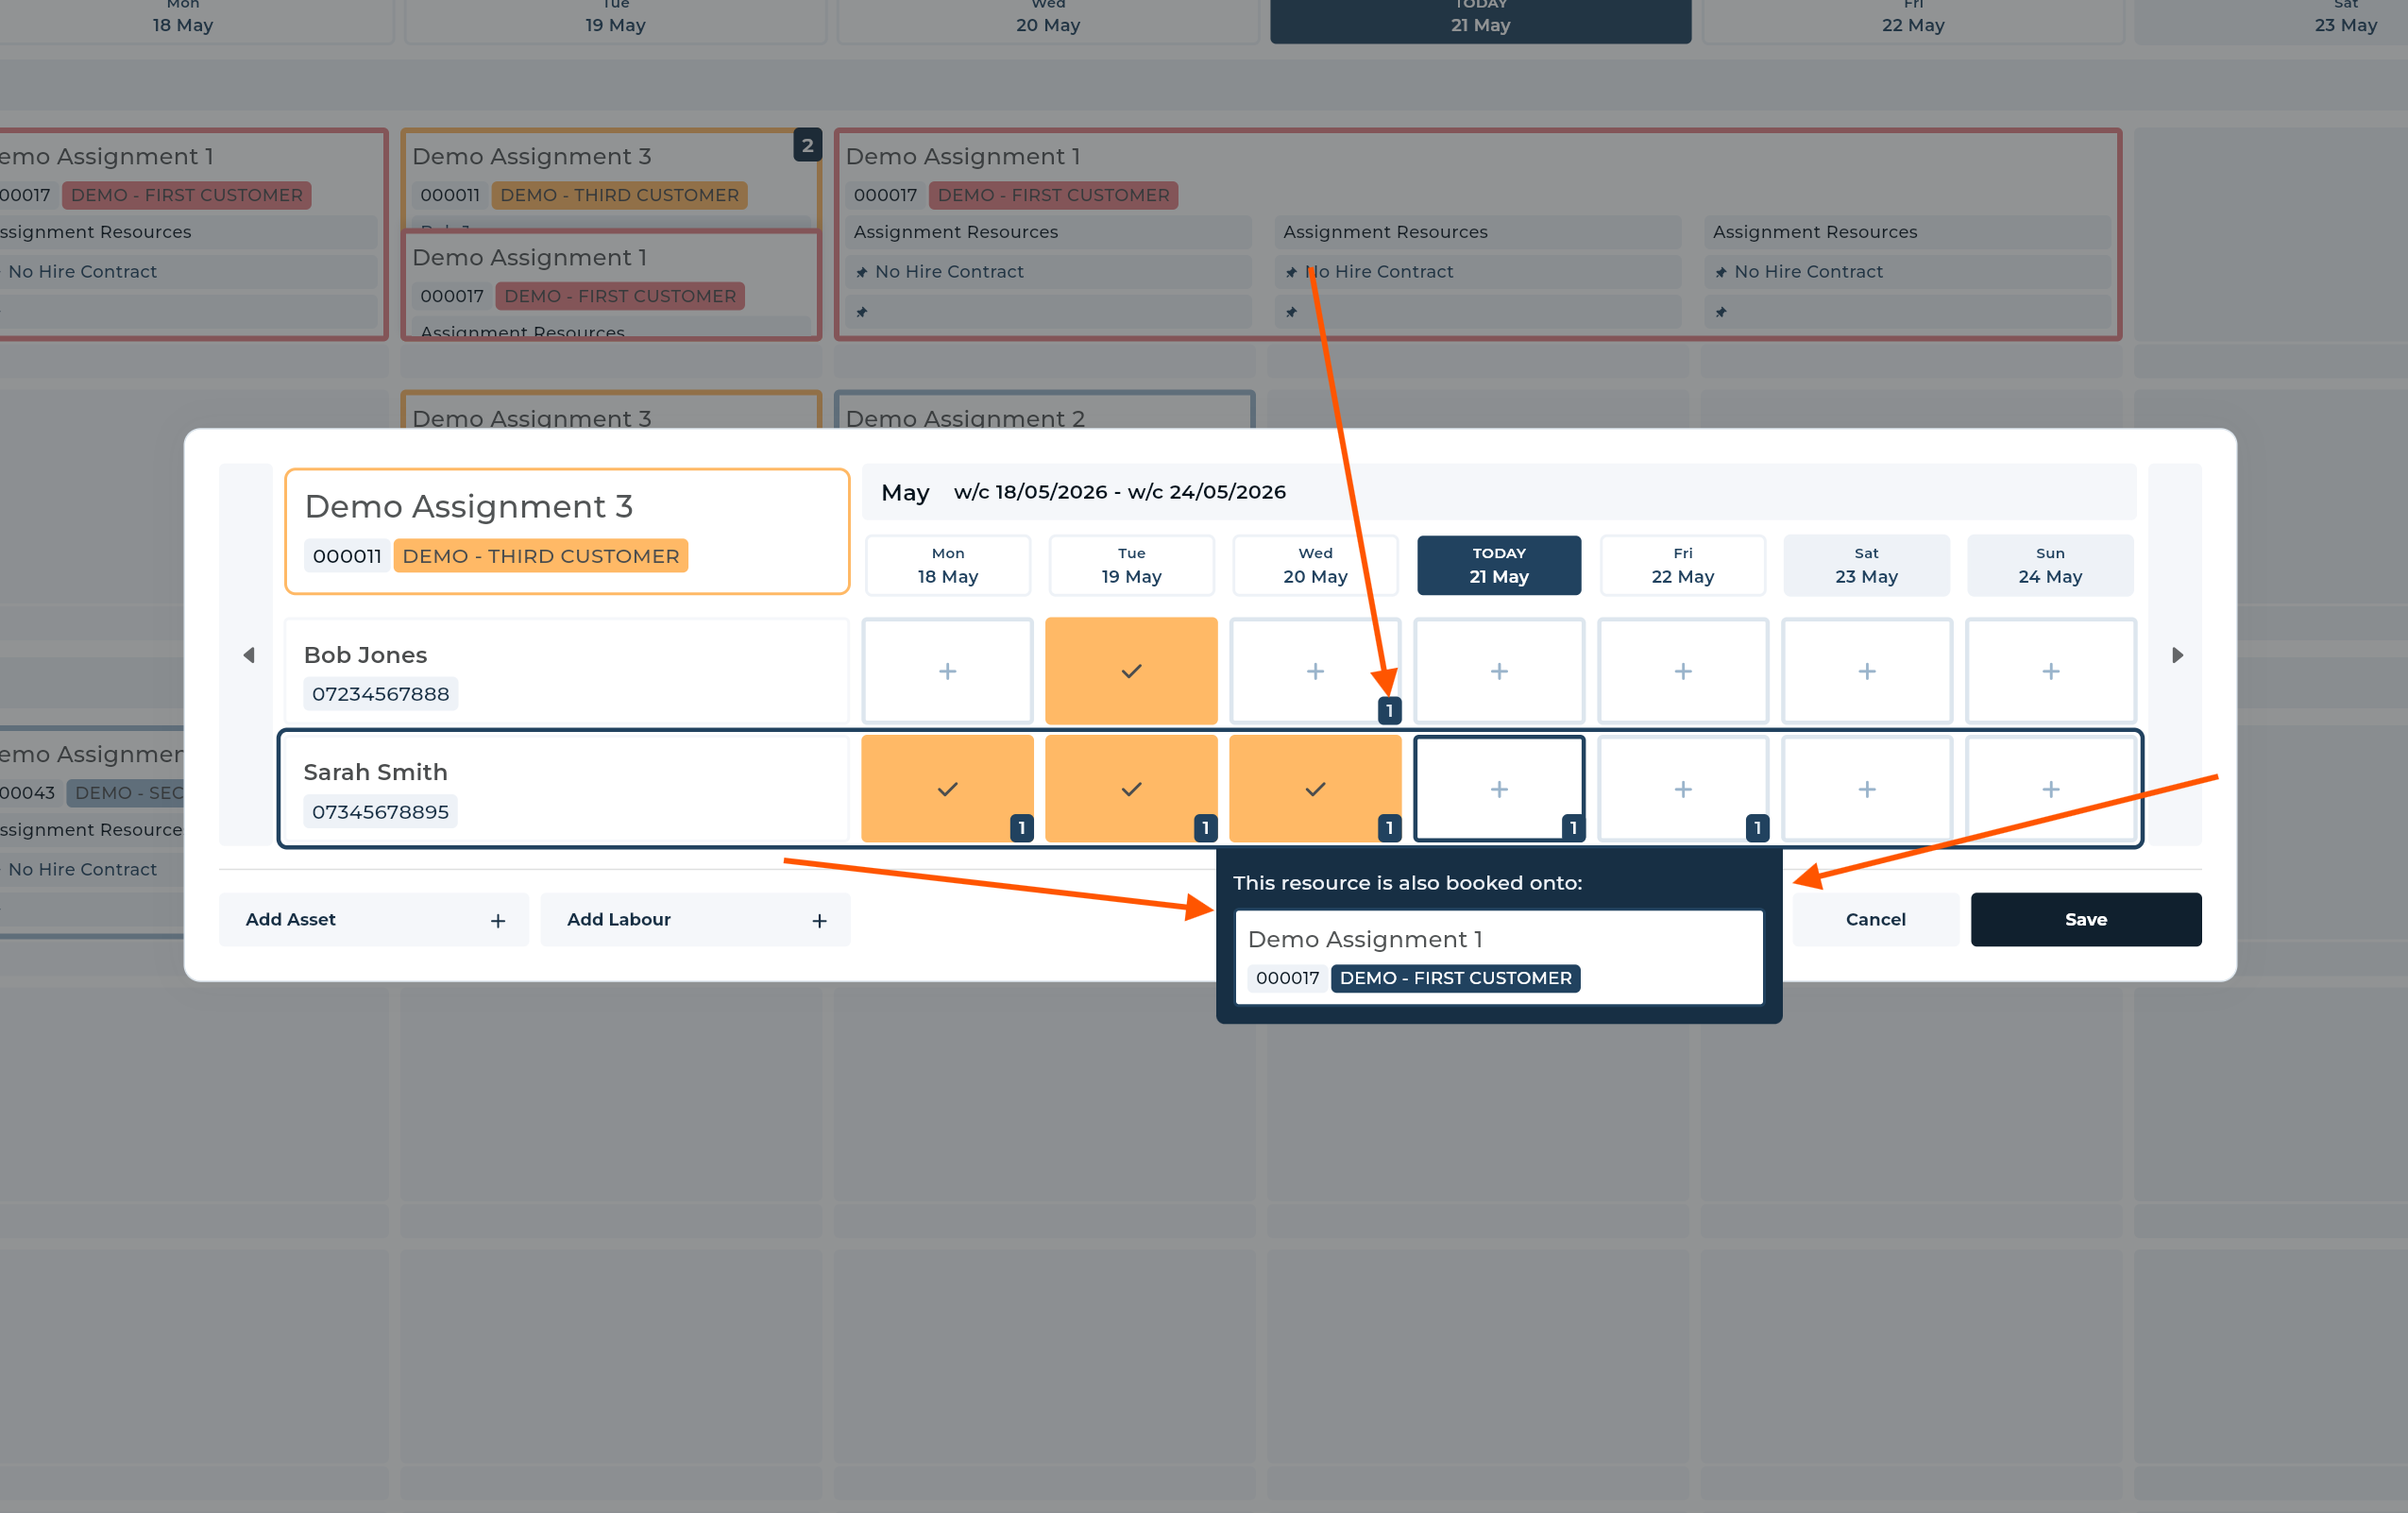
If a resource already has assignments on a selected day, UpRate will show the number of existing assignments in the corner of that day.
You can hover over the day to see which assignments the resource is already assigned to. This helps you decide whether the resource can be booked onto another assignment for the same day.
Overbooking on the Multi-Week Scheduler
On the Multi-Week Scheduler, you can now book resources onto days that already have existing assignments.
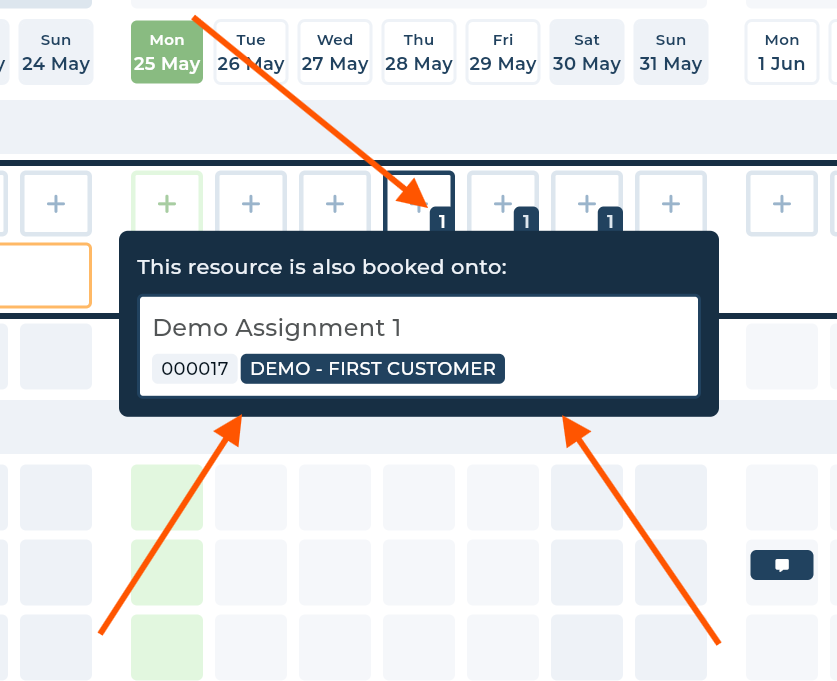
When a resource already has one or more assignments on a day, UpRate will show this clearly on the scheduler.
You can hover over the day to see which assignments the resource is already booked onto. This helps you quickly identify existing bookings before deciding whether to add another assignment for the same day.
Multiple Assignments Per Day Pop Up
When a day has multiple assignments, left click on that day to open the Multiple Assignments Per Day pop-up.
This pop-up gives you an expanded view of all assignment stickers for that day.
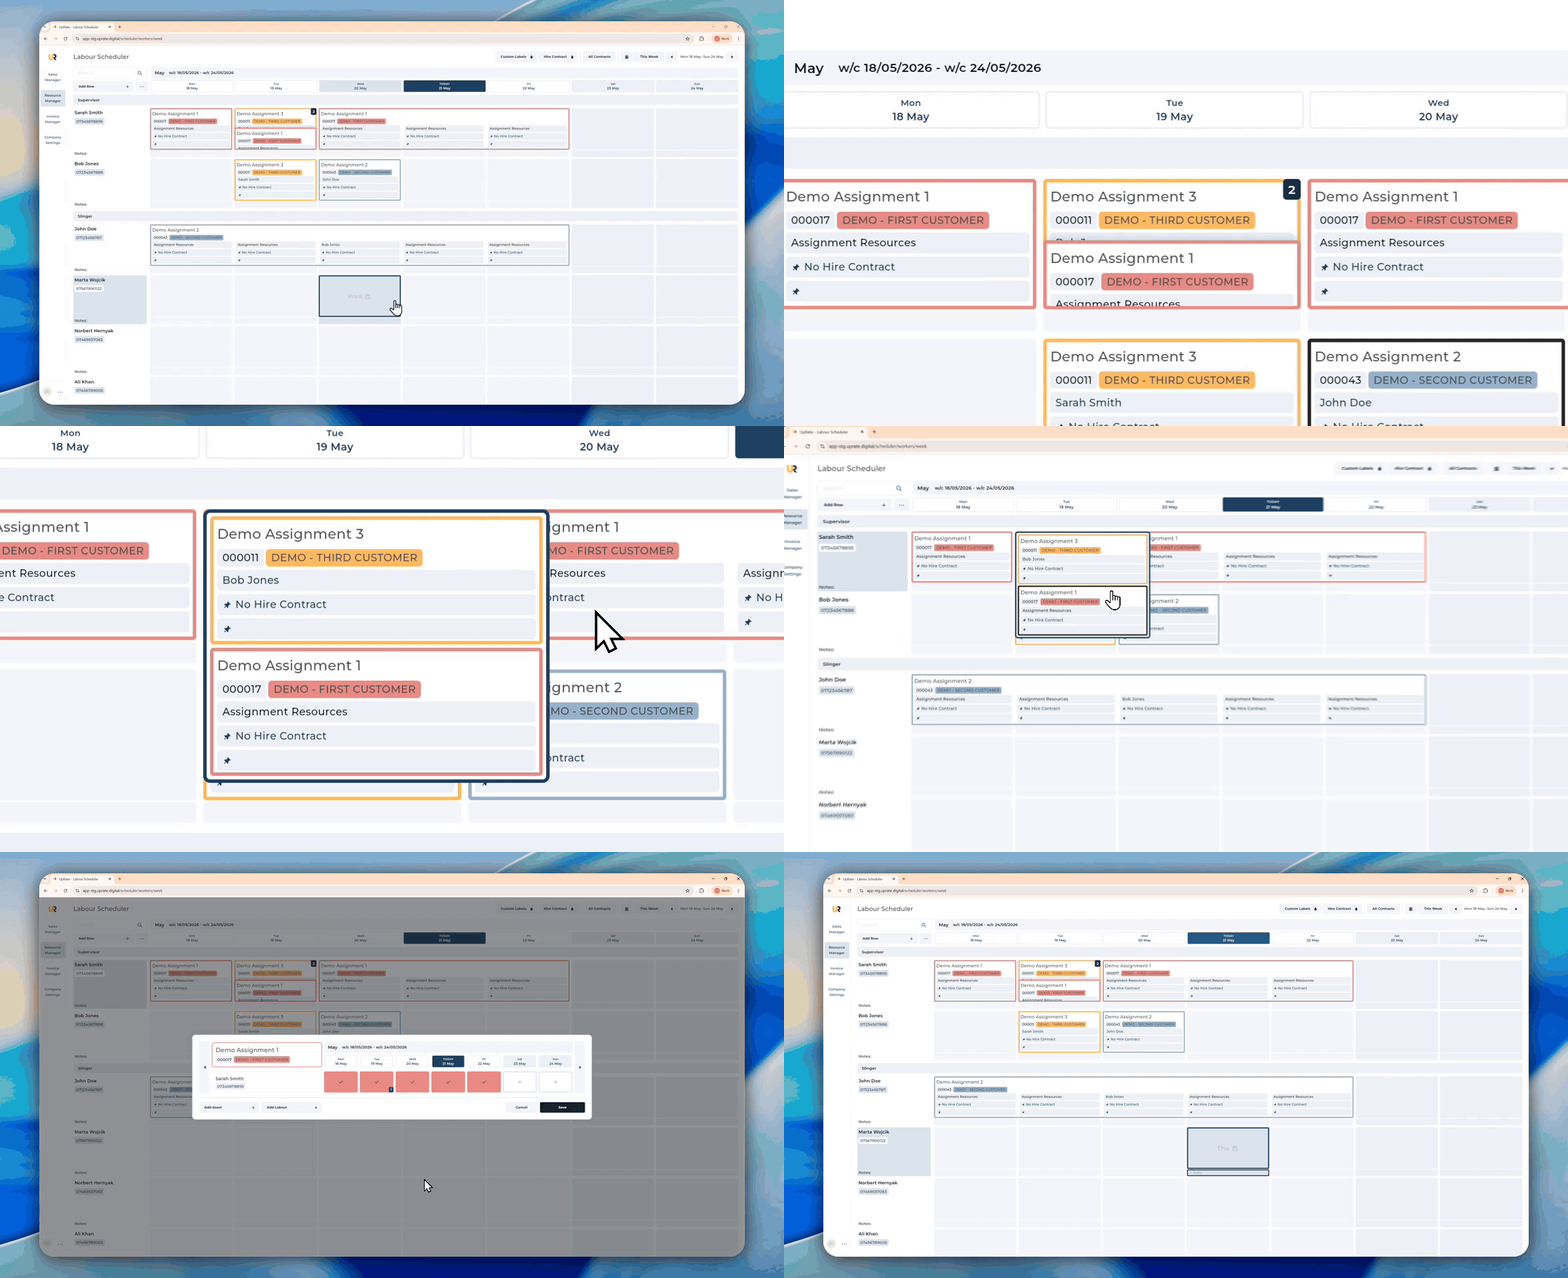
From this view, the usual scheduler sticker actions still work in the same way, including:
Right-click menu options
Left-click to open the Engagement Scheduler pop-up
Custom labels and Hire Contract Labels
Hover response on the Additional Resources section
This makes it easier to view and manage multiple assignments on the same day without changing how the scheduler stickers work.
Assignment Overview
The Assignment Overview is a daily view of the assignment.
It shows the key information linked to the selected assignment day, including:
Additional equipment information
Information for the hire desk
Information for the workforce
Resources assigned to the contract for that day
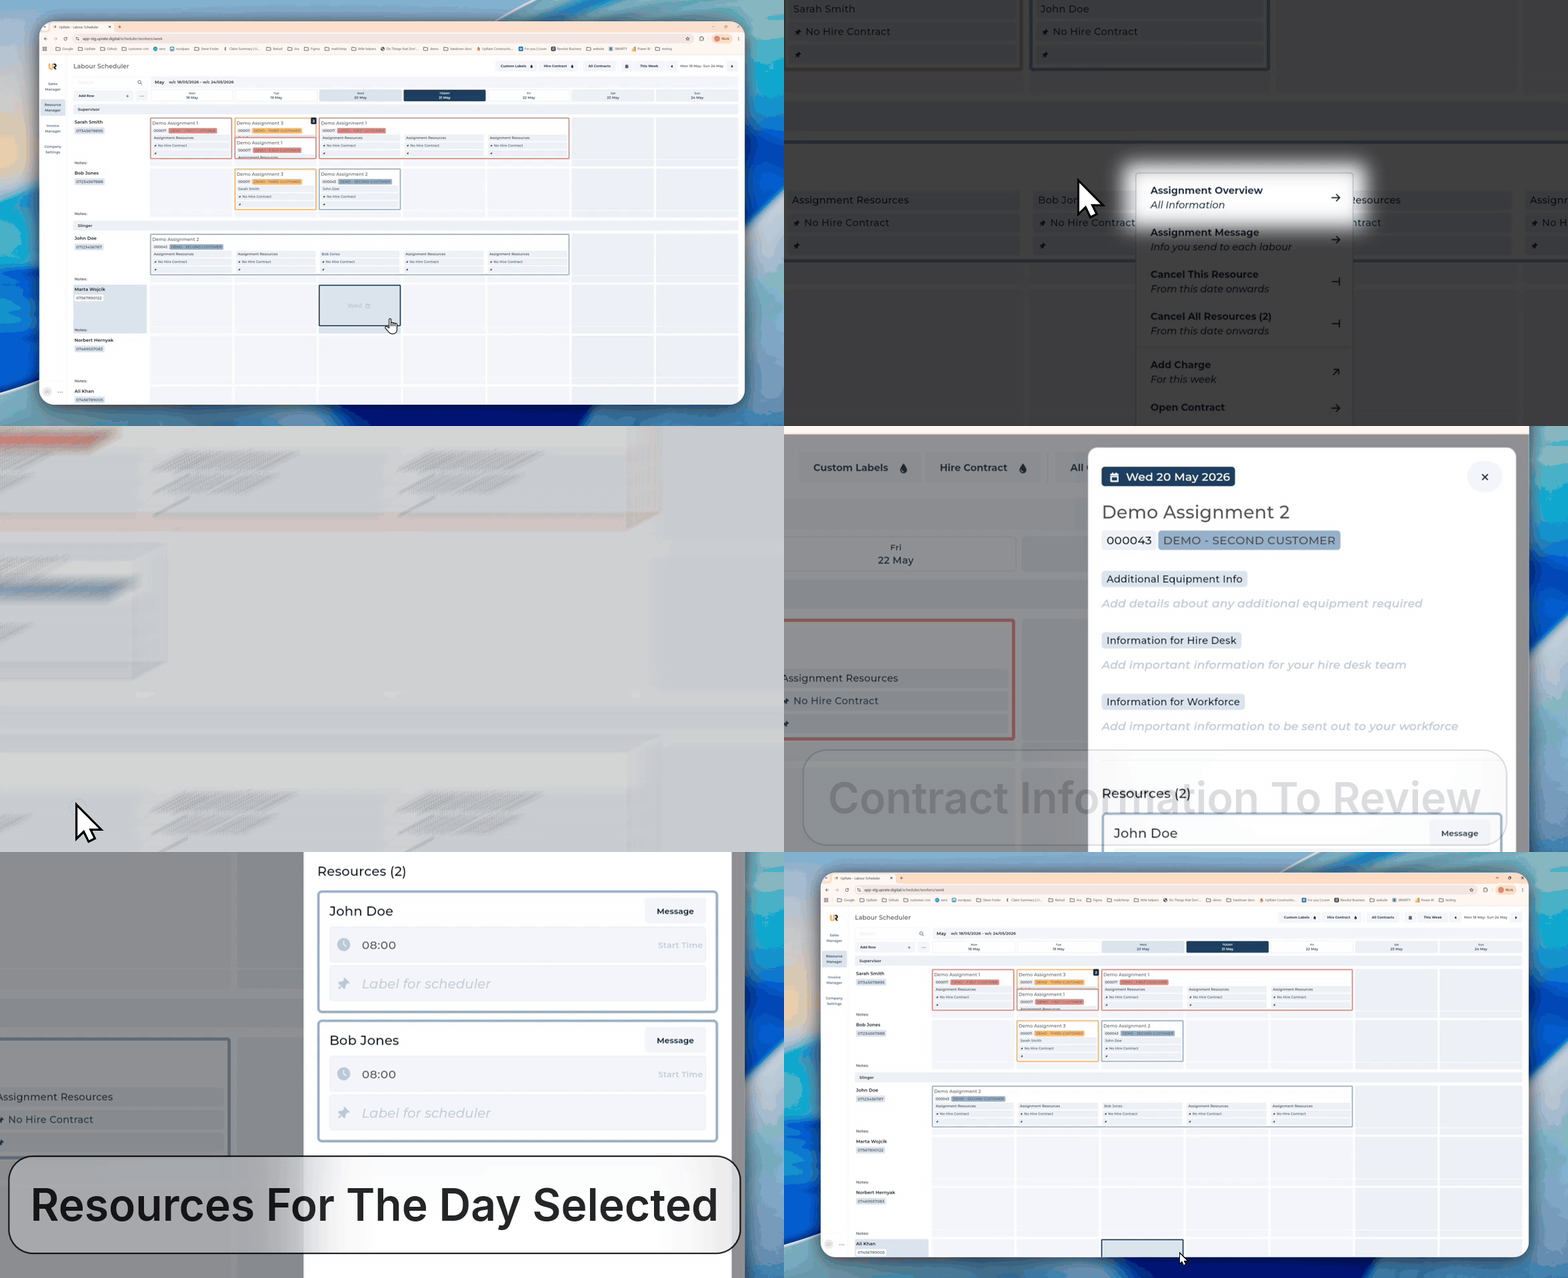
Clicking on any of the assignment information will open the Edit Contract side panel, where you can make changes if required.
From the Assignment Overview, you can also quickly edit each resource’s Label and Start Time.
This is useful before sending the daily assignment message.
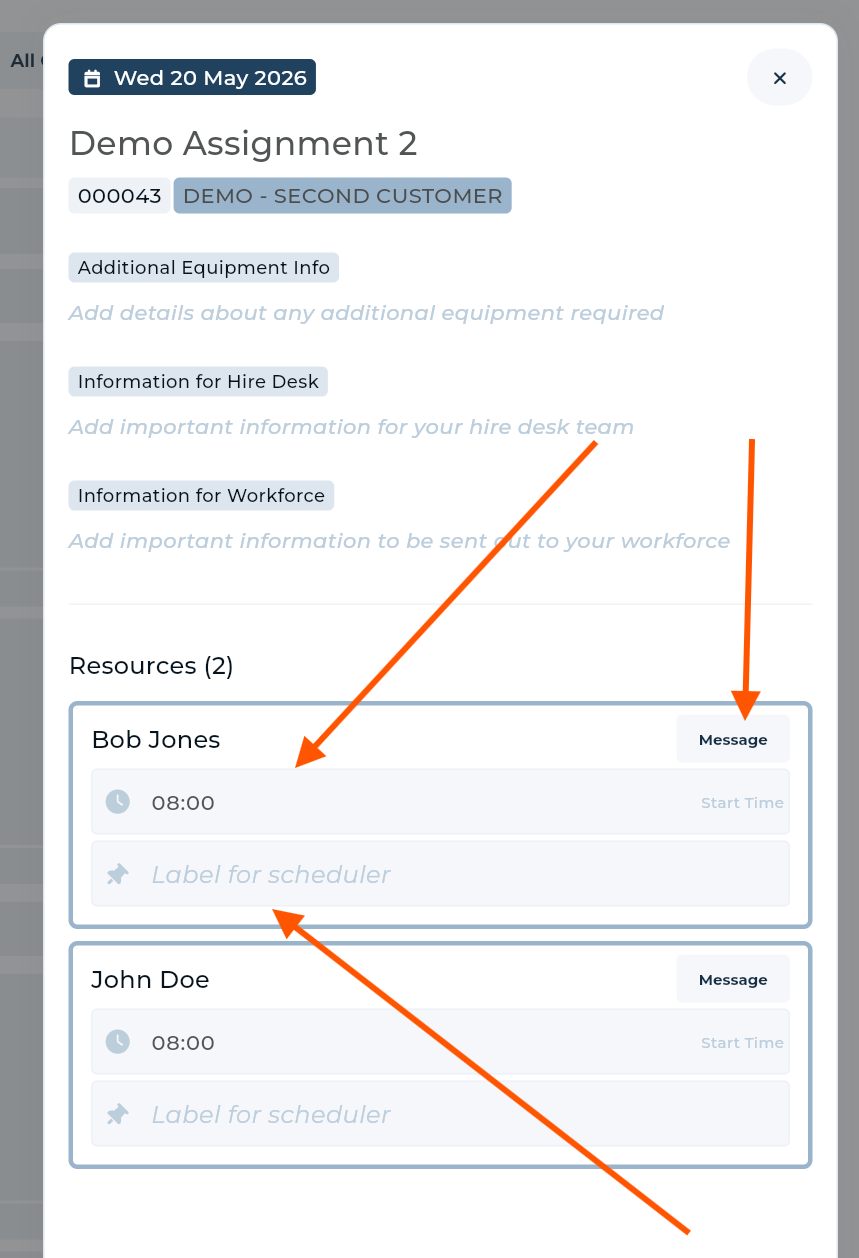
Right Click Menu on the Scheduler Sticker
Right click on any sticker on the scheduler -> Assignment Overview
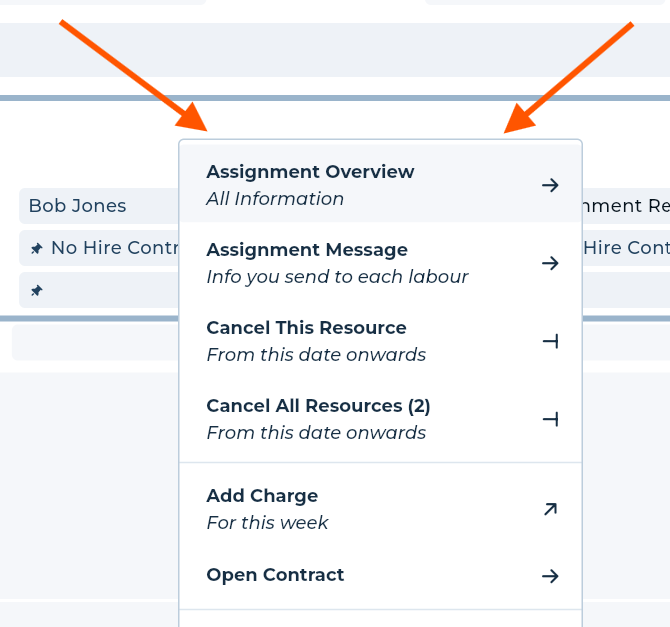
Additional Resources Hover View
When you hover over the Additional Resources section on a scheduler sticker, a dialogue will show the assignment resources for that day.
Clicking on any resource in this dialogue will open the Assignment Overview.
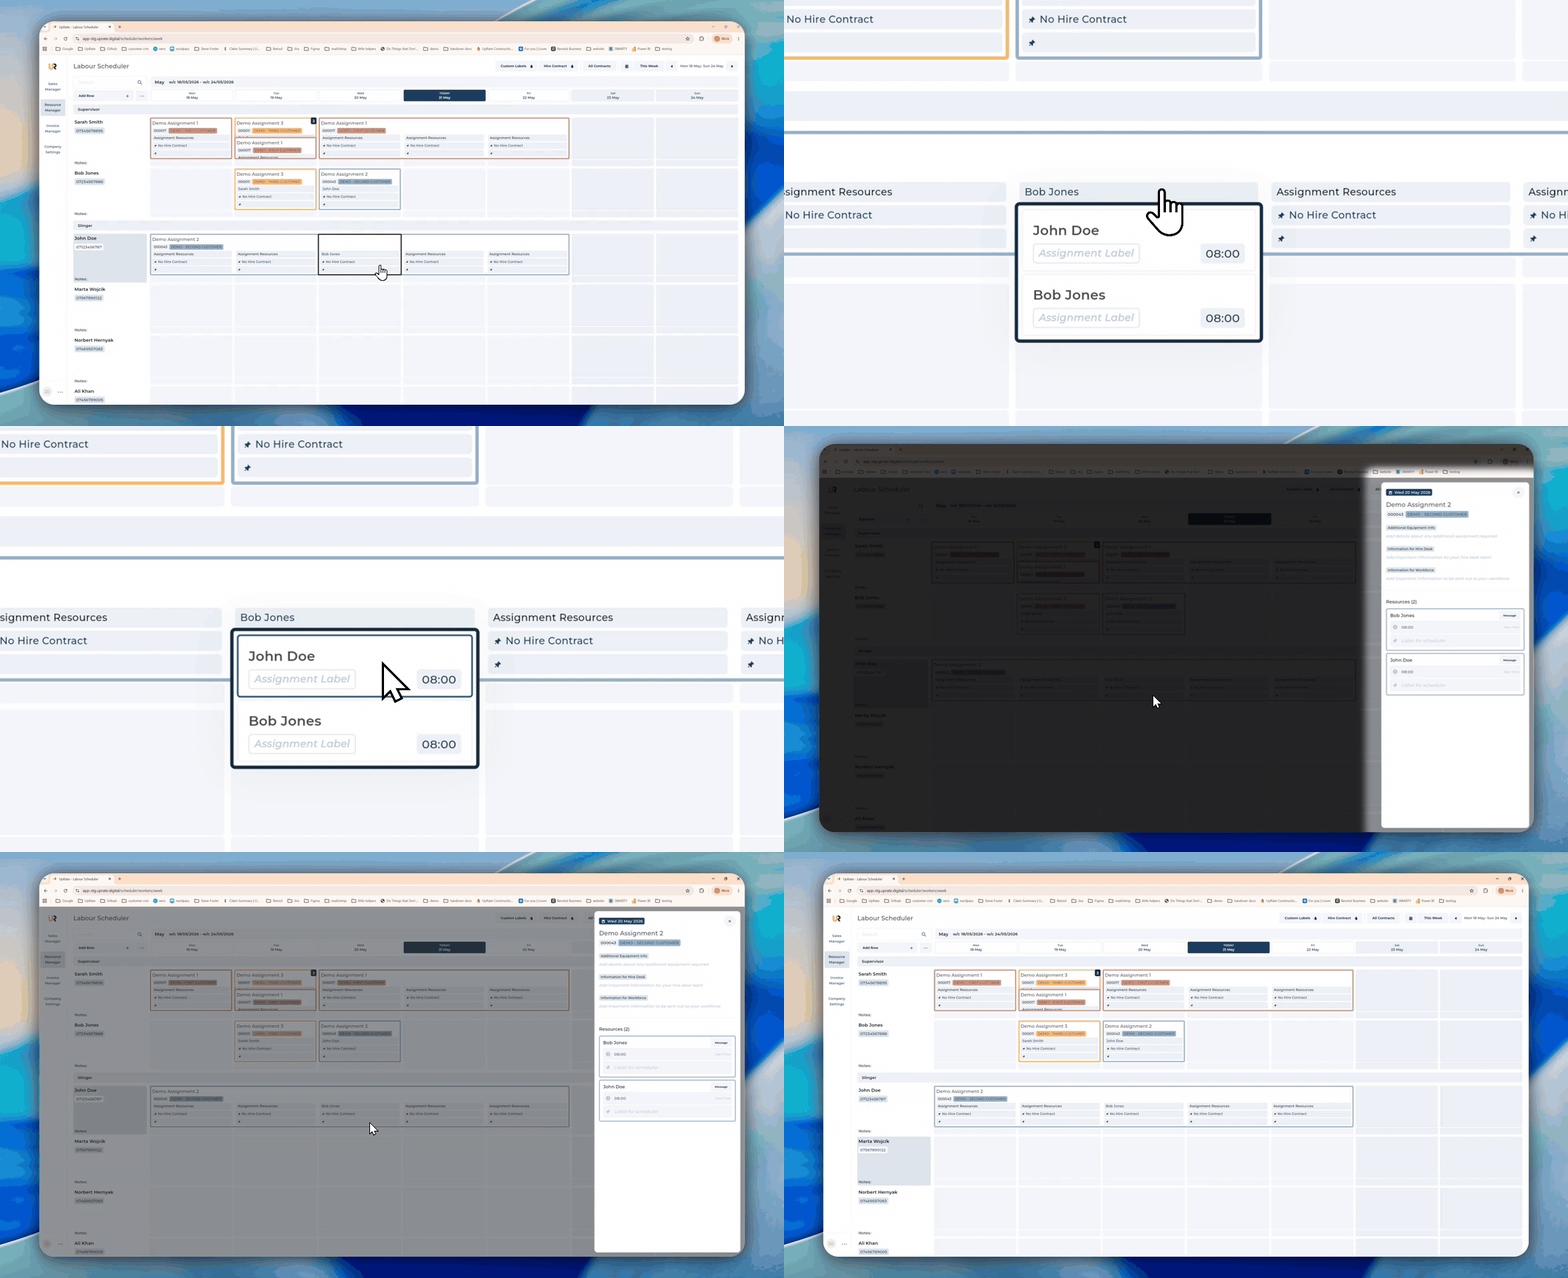
This replaces the previous pop-up, where you could only edit one resource’s label or start time at a time.
The new view makes it easier to review and update these details for all resources assigned to that day.
Engagement Scheduler Date Header
You can now click on a date header in the Engagement Scheduler pop-up to open the Assignment Overview for that day.
This is useful when adding new resources to an existing assignment. After adding the resource, click the relevant date to open the Assignment Overview and update the resource details straight away.
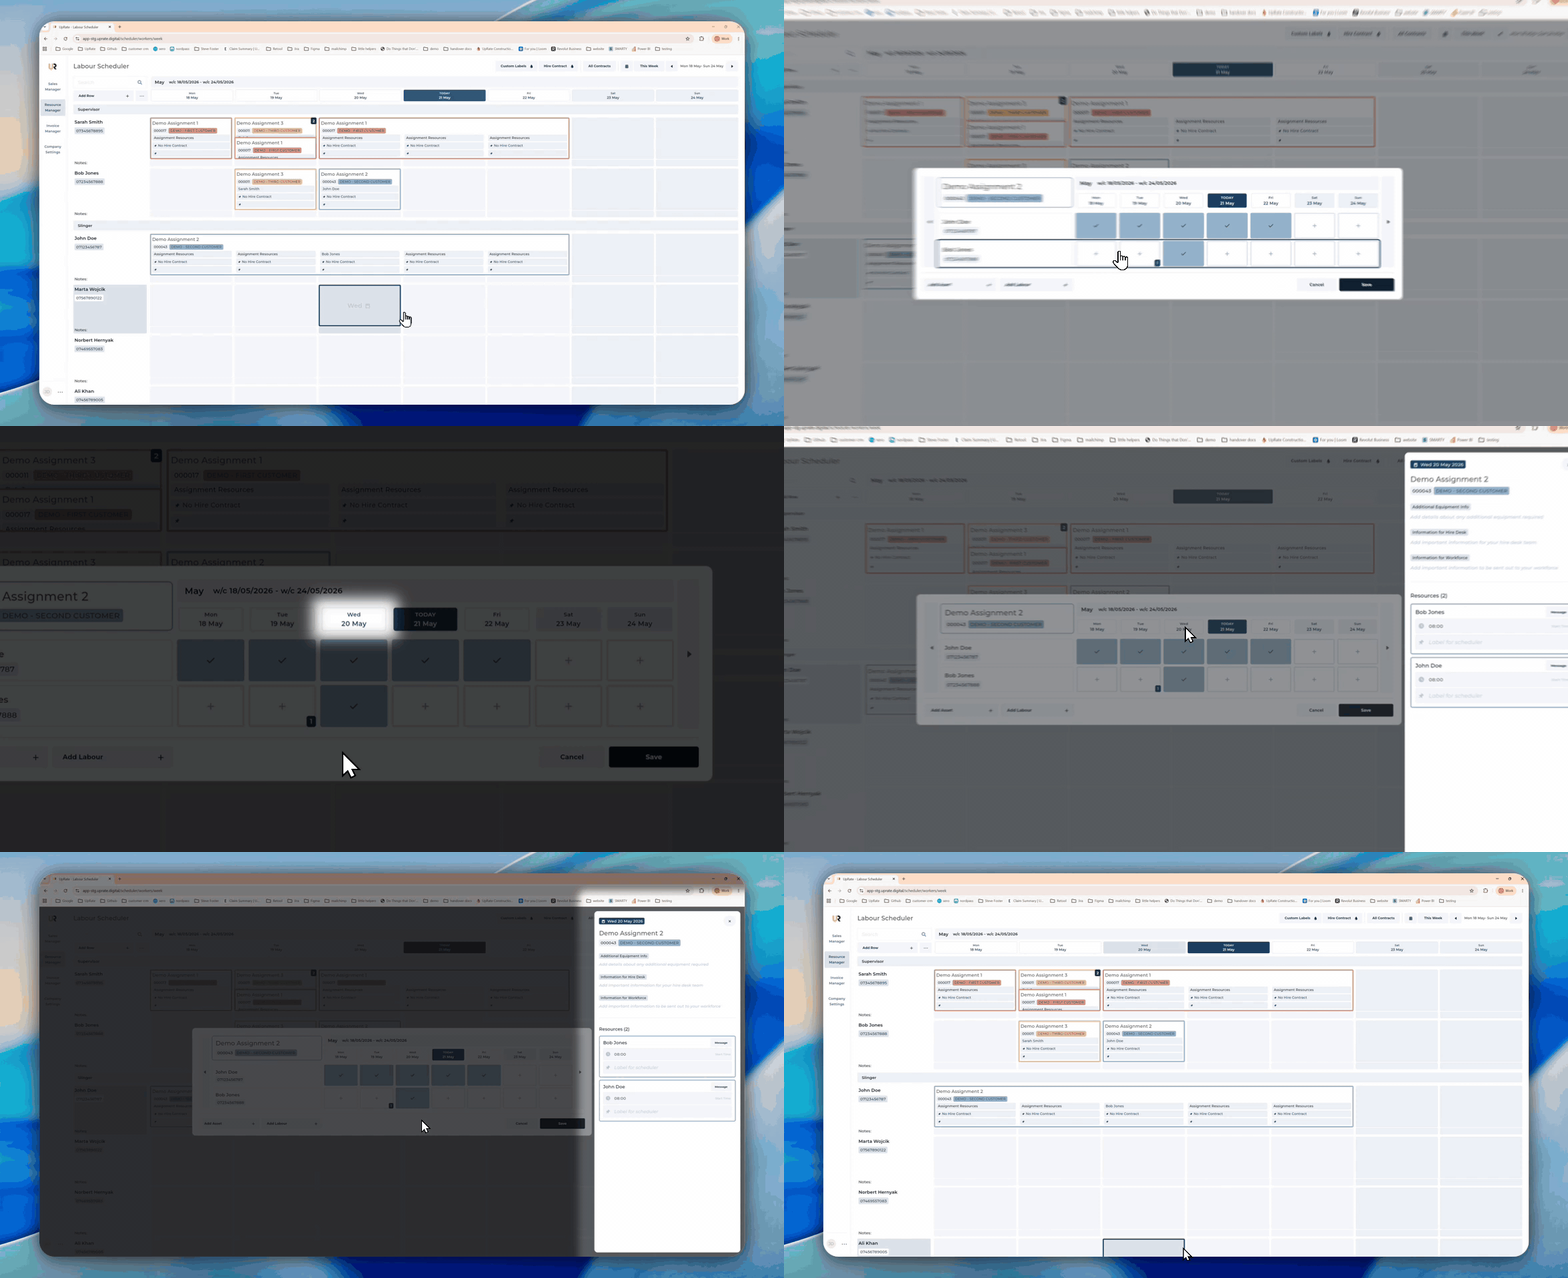
This makes it easier to adjust daily resource details without leaving the scheduler flow.
Assignment Message
The Assignment Message itself has not changed, but it is now easier to access.
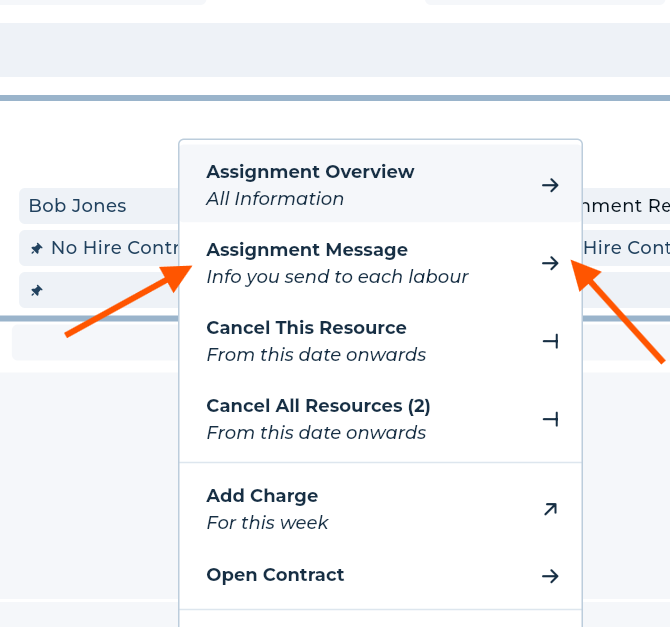
Previously, the Assignment Message was opened by double-clicking the scheduler sticker. It has now been moved into the right-click menu for better accessibility.
From the Scheduler Sticker
Right-click on the scheduler sticker and select the Assignment Message option.
This will open the Assignment Message directly, where you can still:
Copy the message
Send the message via WhatsApp
From the Assignment Overview
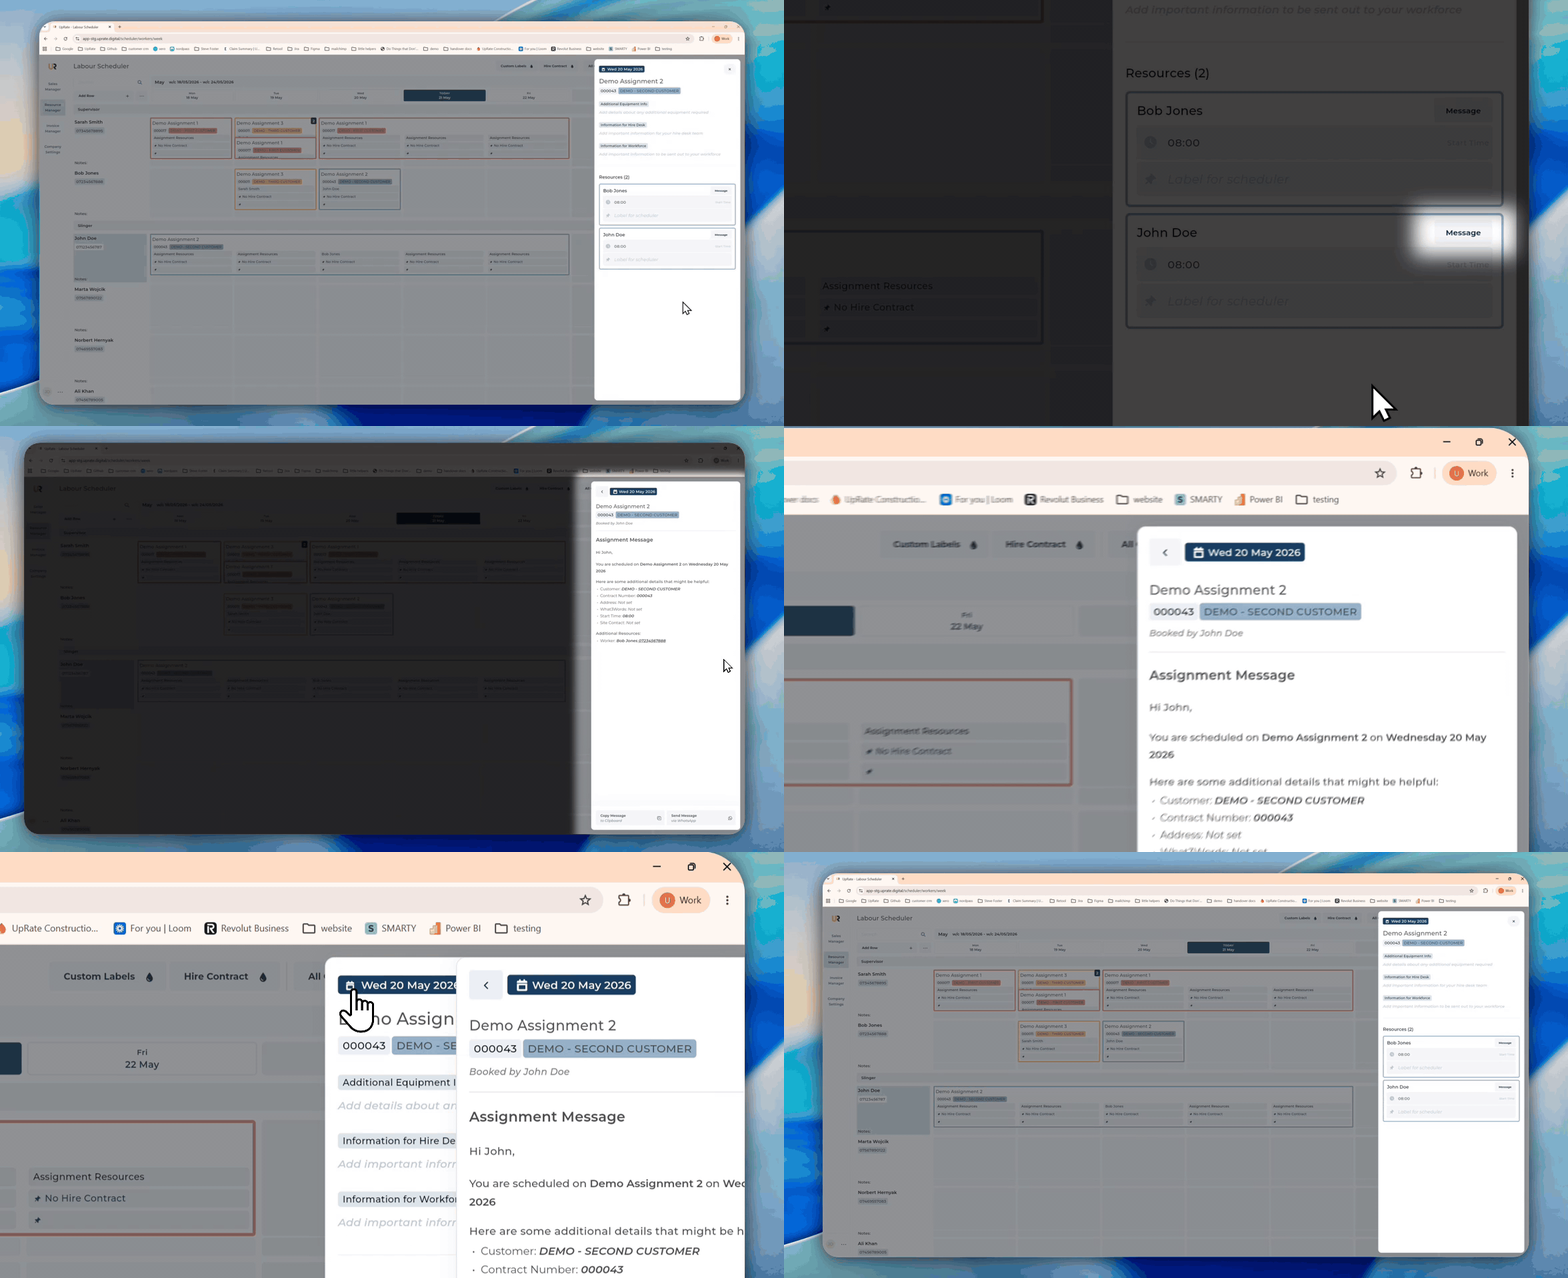
You can also open the Assignment Message from the Assignment Overview side panel.
This view shows all resources assigned to that day, making it easier to check that each labour resource receives their daily message.
Additional Features
Add Labour and Add Asset Buttons
The Add Labour and Add Asset actions are now separate buttons on the Engagement Scheduler Pop Up.
Previously, these options were selected from a dropdown menu. You can now add either a labour resource or an asset resource with one click.
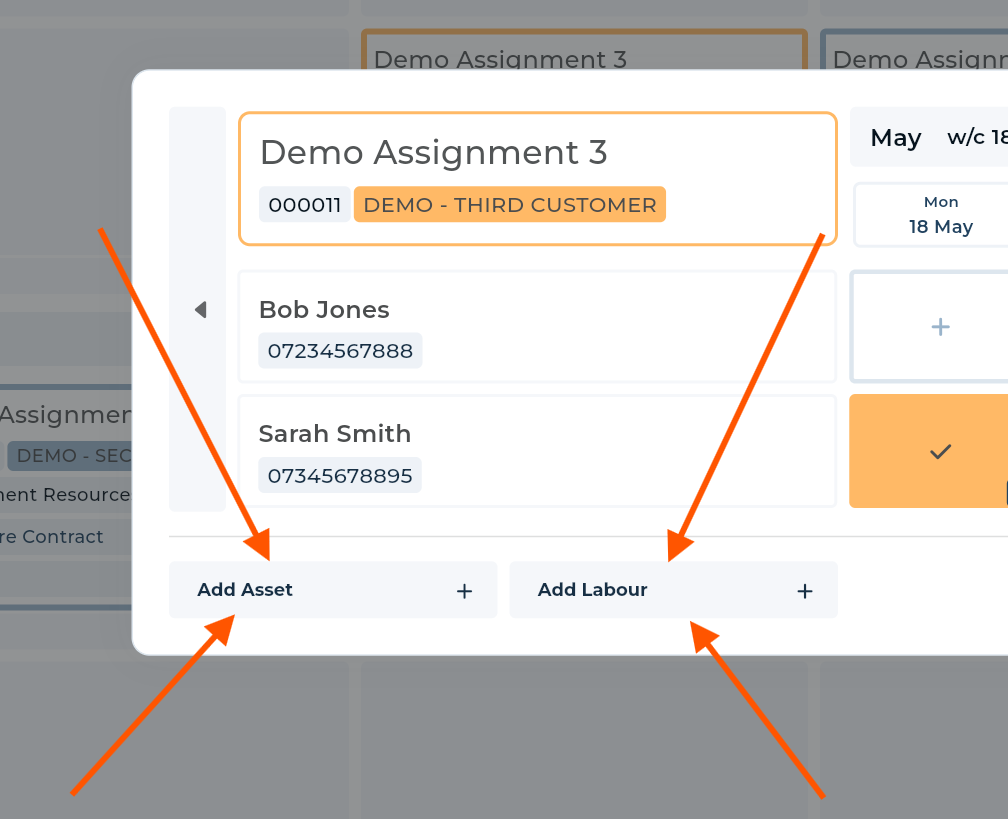
This makes it quicker and easier to add the correct resource type to an assignment.
Search for Sales Codes and Tracking Categories
When using the Xero integration, you can now search through your sales codes and tracking categories when selecting them.
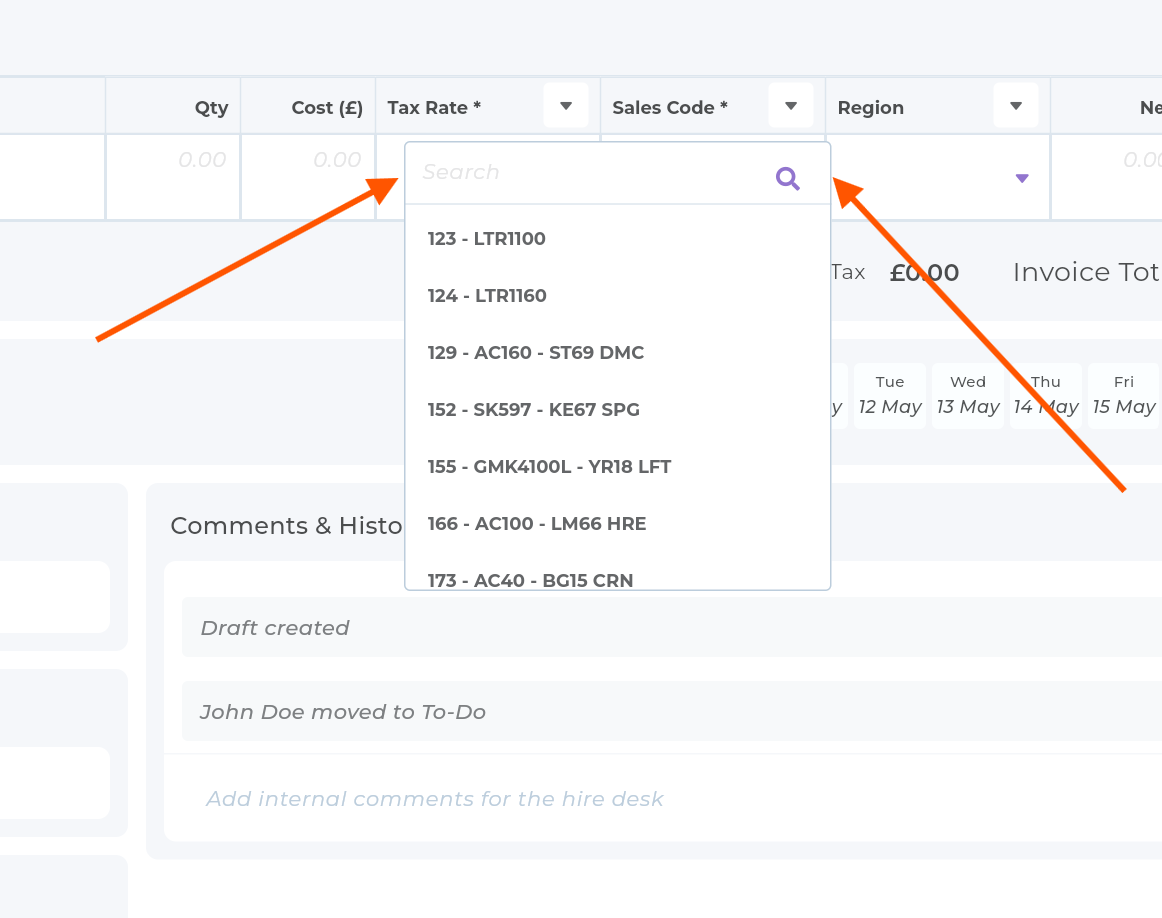
The search option appears when you have more than 10 options available.
This applies to both:
Sales codes
Tracking categories
You can use the search when setting these for:
An individual invoice line item
The entire invoice
This makes it quicker to find and select the correct Xero sales code or tracking category, especially when you have a larger list of options.
Select an Invoice Issue Date
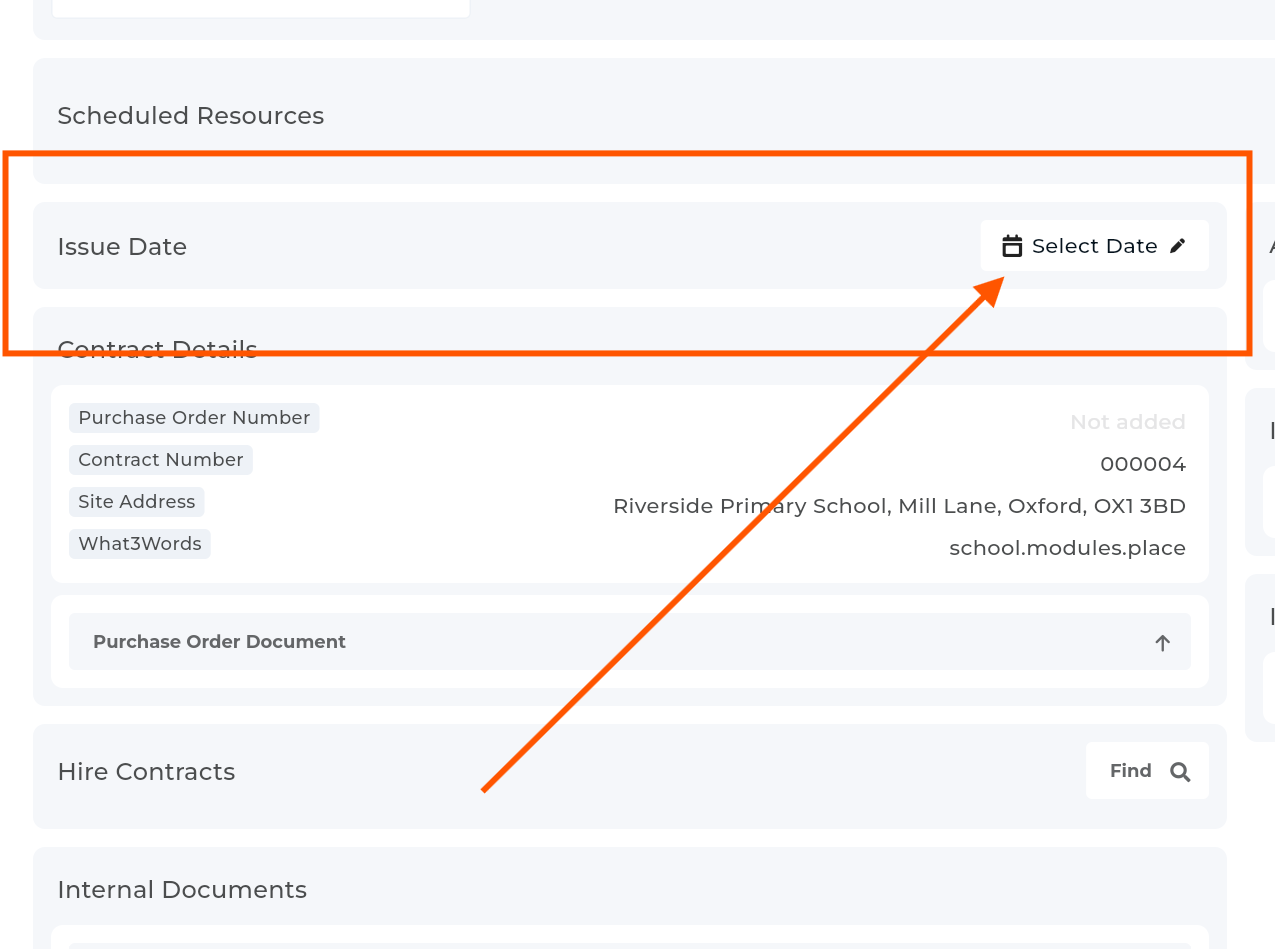
You can now select an Issue Date when creating an invoice.
This option is available to all users, but is especially useful when using the Xero integration.
When an Issue Date is selected, UpRate will use this date as the invoice Issue Date. This helps ensure the correct payment due date is applied.
If no Issue Date is selected, the invoice Issue Date will default to the date the Xero invoice is created from UpRate.
Xero Invoice Marked as Sent
When an invoice is created in Xero from UpRate, it is not automatically marked as sent.
If the documents package is later sent from UpRate, and the invoice was originally created through UpRate, the invoice will also be marked as Sent in Xero.
This helps keep the invoice status aligned between UpRate and Xero, so other team members can see whether the invoice has been sent.