
Engagement Scheduler Pop Up
Guides how to use the engagement scheduler pop up in the single week view.
Overview
When clicking on an existing sticker in the Single Week view scheduler, the Engagement Scheduler Pop Up comes into view. This interface allows you to add or remove additional resources, modify assignment dates, and check resource availability at a glance.
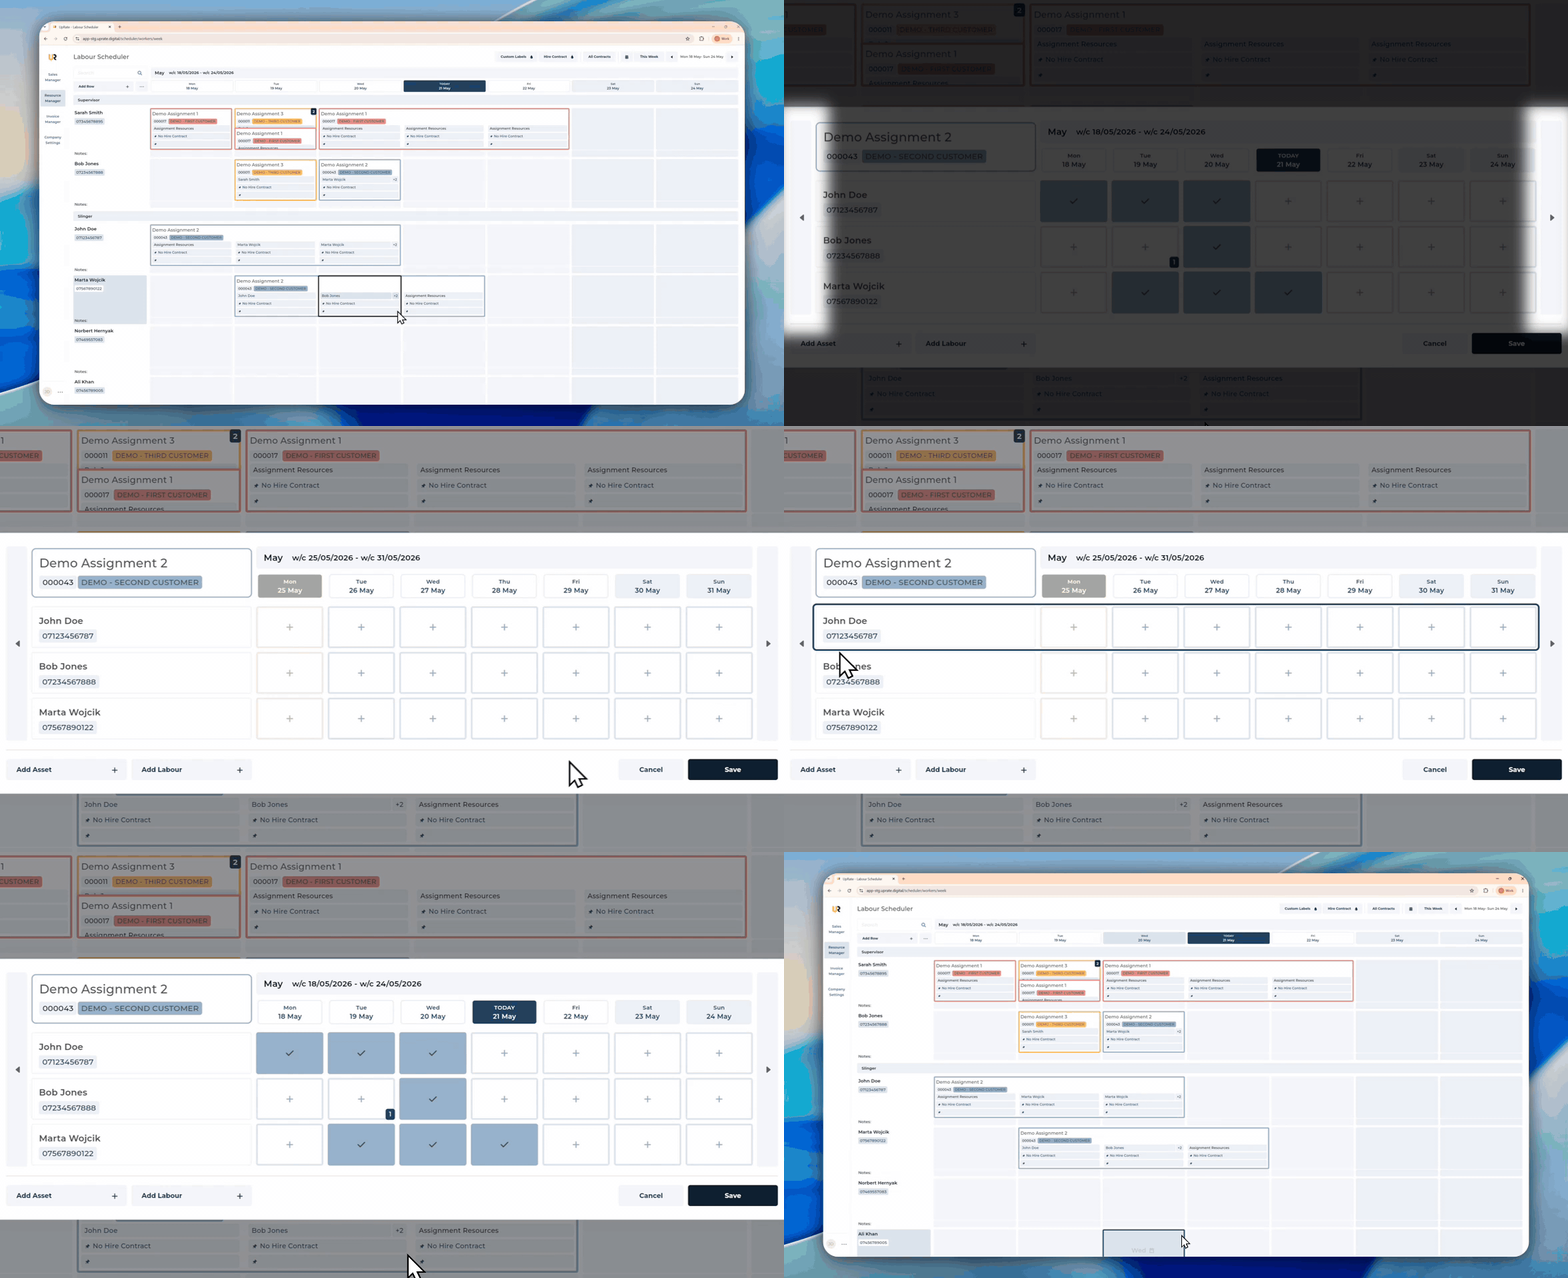
Navigate Across the Weeks
Click on a sticker on the scheduler
Click on the navigation buttons to go a week forward or backwards
Change Dates for an Assignment
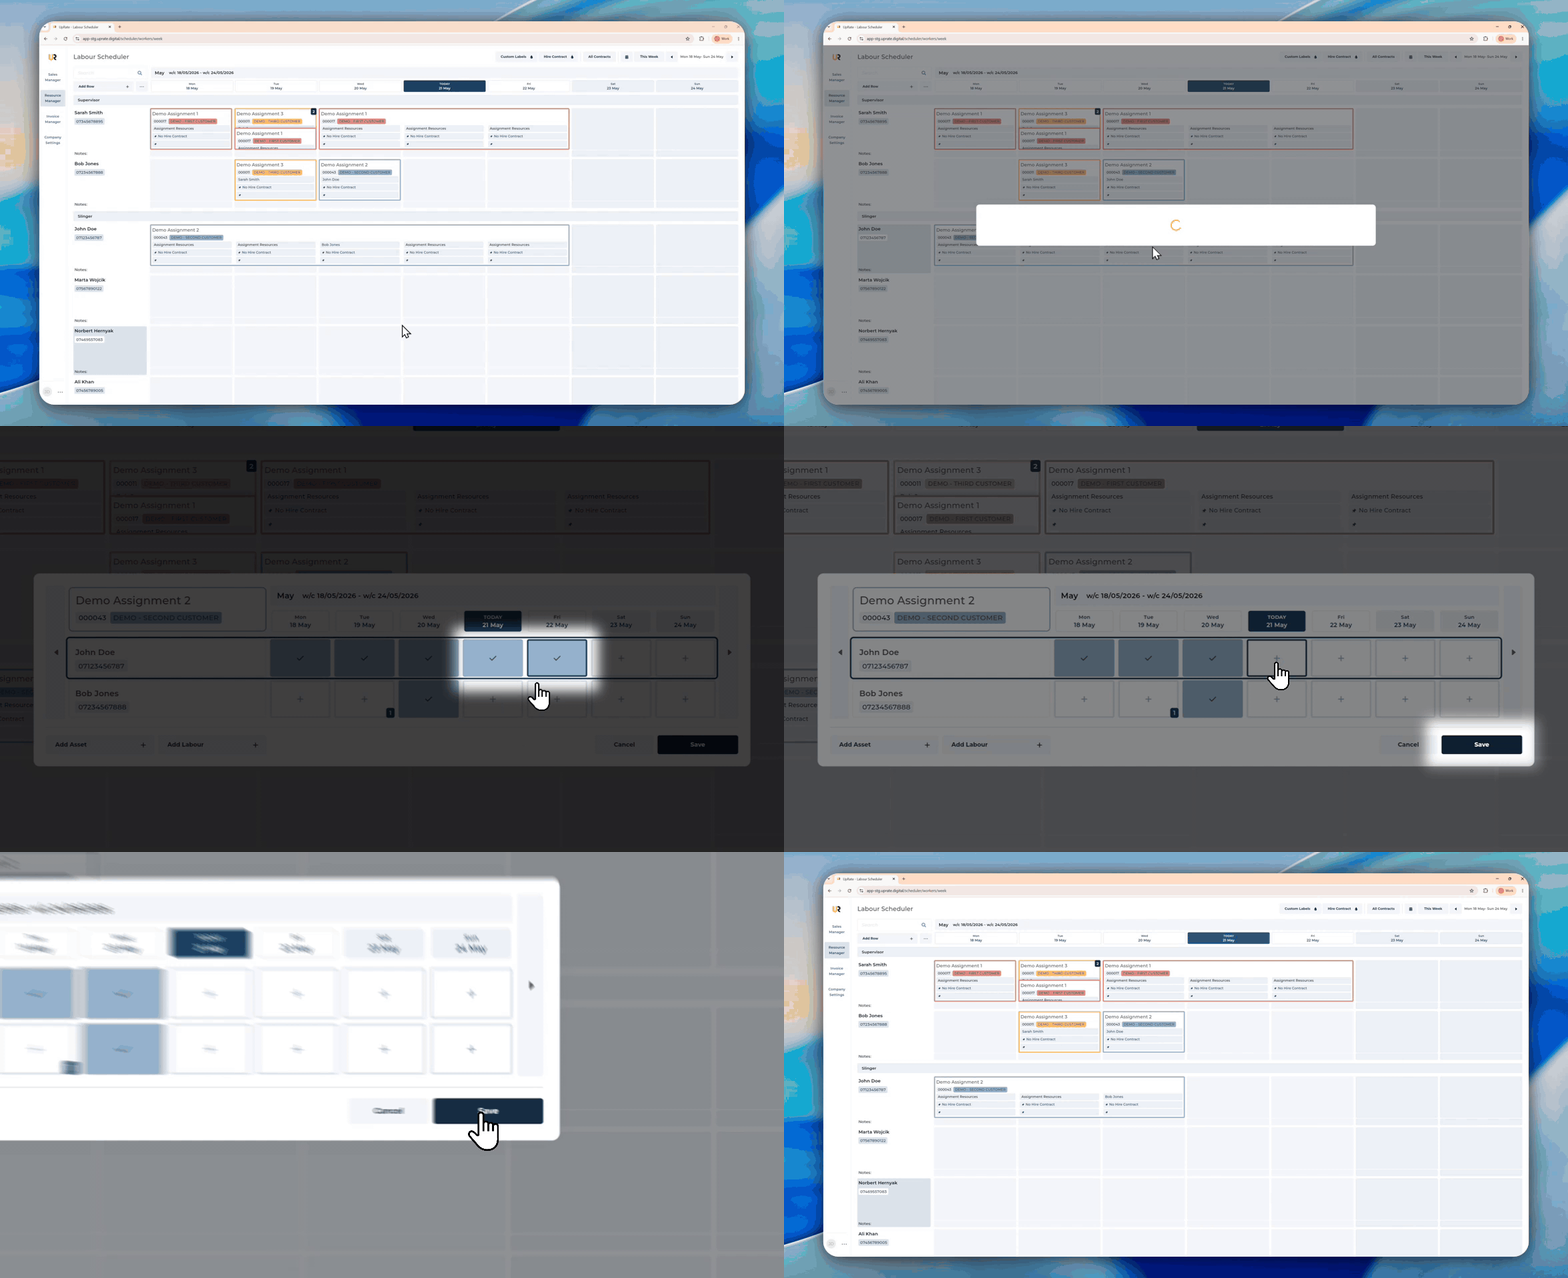
You can easily update resource bookings without creating a entirely new assignment.
Open the Engagement Scheduler Pop Up.
Select or deselect days directly within the scheduler grid to modify the assigned timeline.
Add Additional Resource
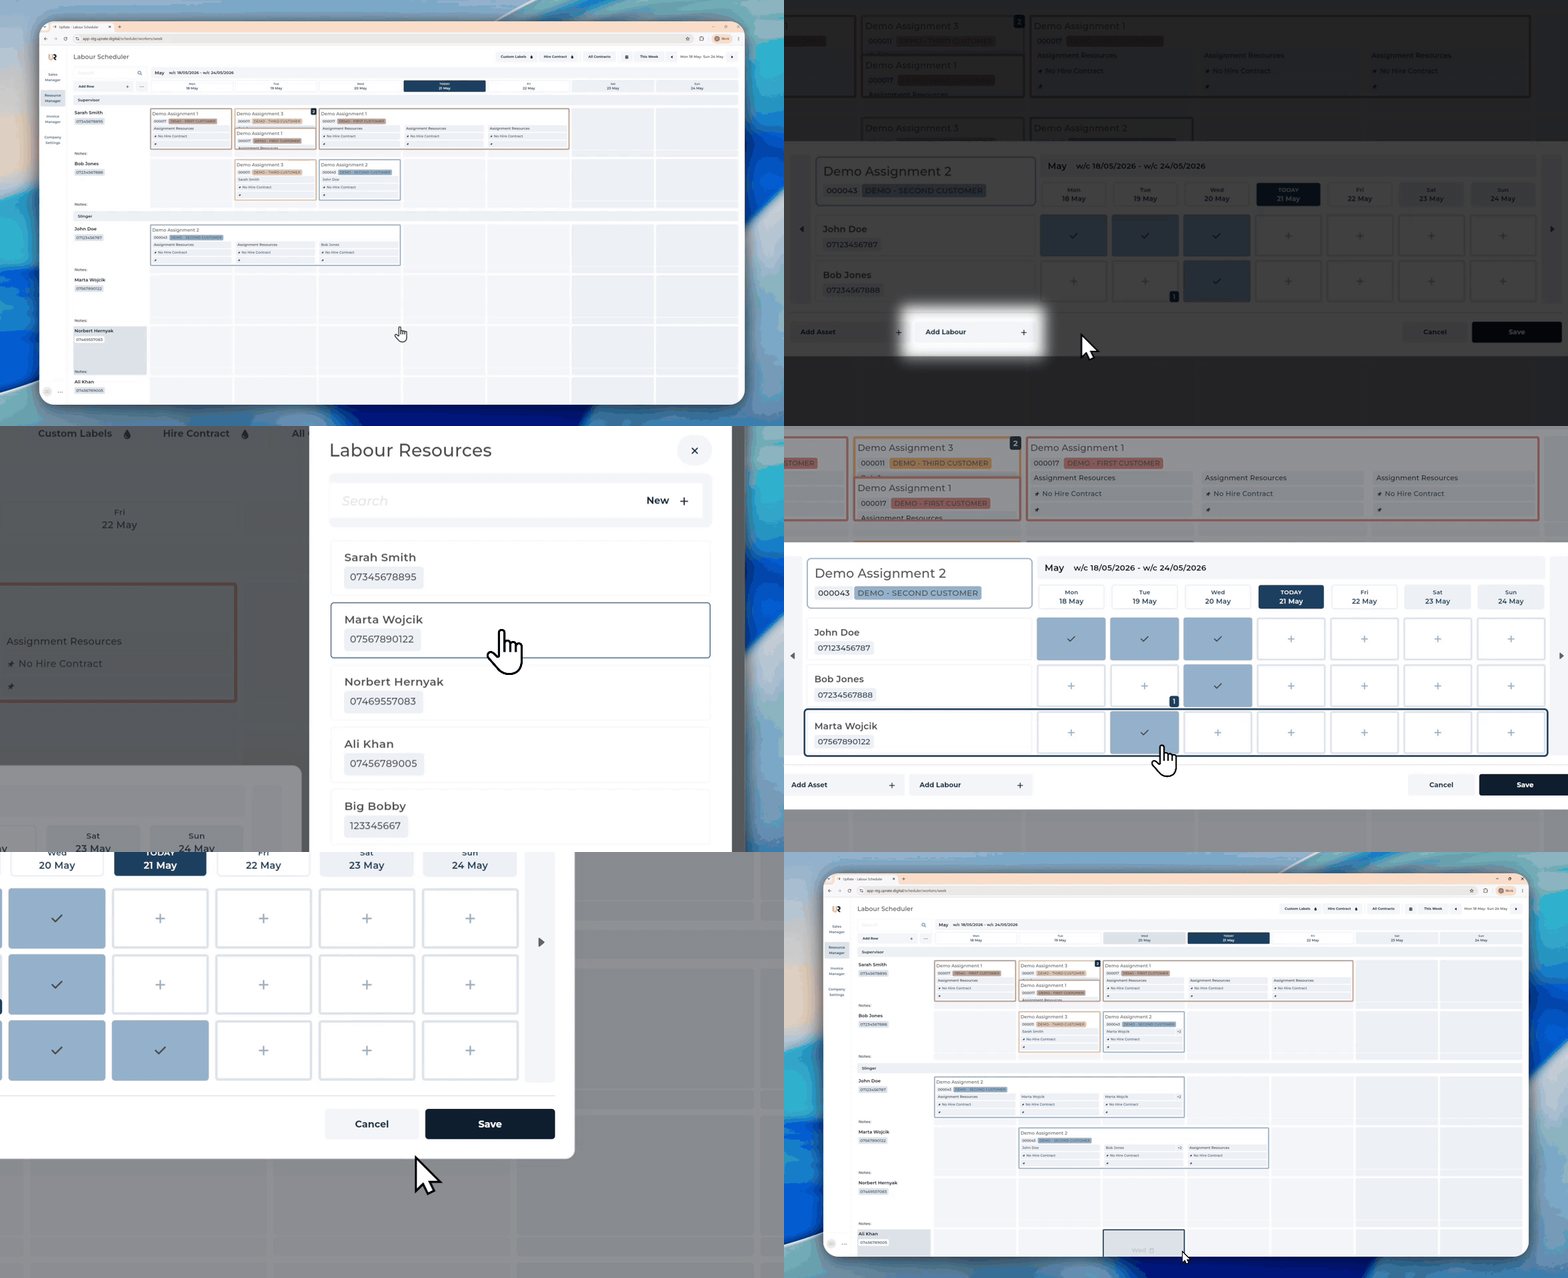
Click on a sticker on the scheduler
Click on Add Labour/Add Asset
Select the resource from the side panel
Click on the dates you want to allocate them to
View Resource Availability & Existing Bookings
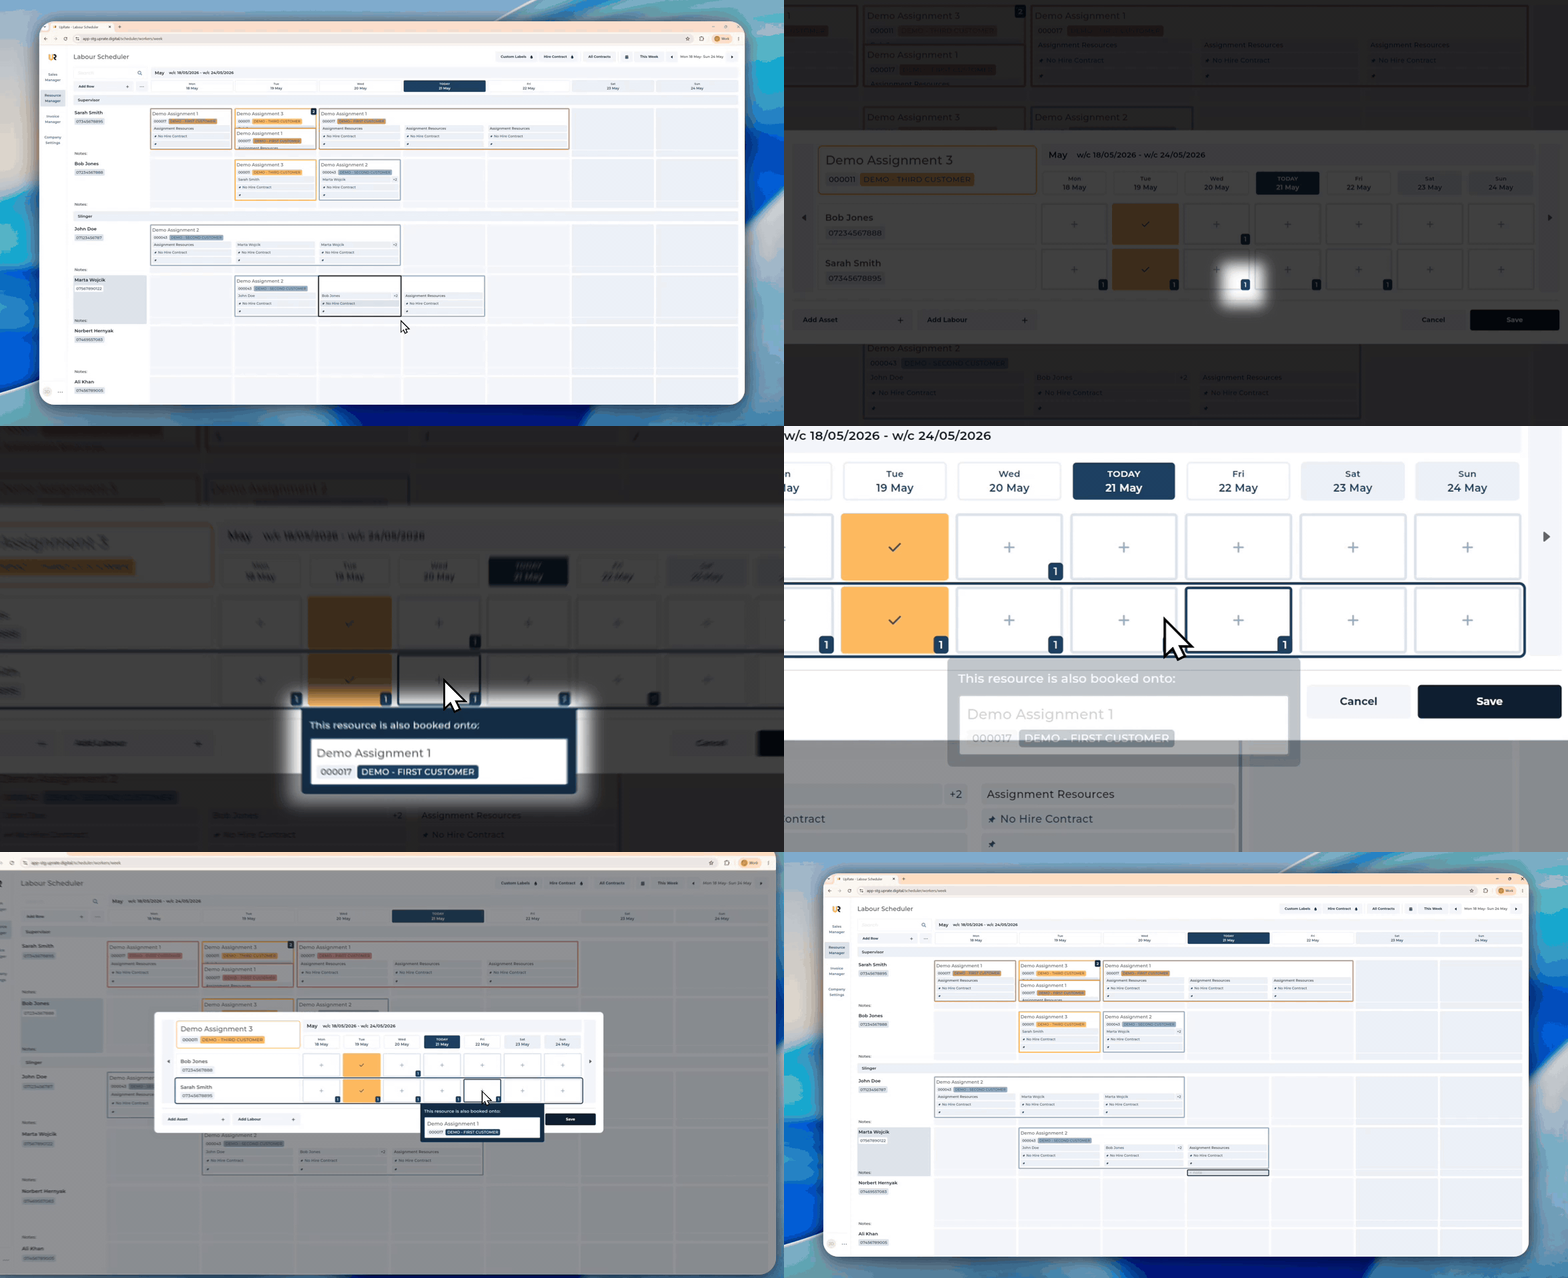
To prevent double-booking or over-allocation, the scheduler tracks existing commitments:
The Number Indicator: If a resource already has assignments on a specific day, a number will appear in the corner of that day's cell, indicating how many total assignments they are currently booked onto.
Hover Details: Hover your cursor over the day cell to view a popover list of those existing assignments. Use this to quickly verify if the resource has the bandwidth for an additional booking.